Disclosure: As an Amazon Associate, HikePod earns from qualifying purchases at no extra cost to you.
⭐ Our Top Pick
🏆 Best Overall: MSR Alpine Stowaway Pot — hard-anodized aluminum and non-stick coating eliminate hot spots for consistently perfect rice without babysitting the heat.
💰 Best Value: Toaks Titanium 750ml Pot — ultralight titanium at an affordable price, though it requires more active heat management to prevent burning.
Introduction
Burned rice at the bottom of your camp pot is one of those frustrations that can turn a peaceful backcountry dinner into a scraping, soaking ordeal. We've all been there—lifting the lid to find fluffy rice on top and a blackened crust welded to the bottom. The culprit is almost never the rice itself, but rather the interaction between your heat source, cookware, and water ratio.
After comparing cooking methods across dozens of camping trips and analyzing what actually works in field conditions, we've identified the precise techniques that prevent burning while delivering consistently fluffy results. The secret isn't expensive gear or complicated recipes—it's understanding how heat behaves on trail stoves and campfires, then adjusting your water ratio and cook time accordingly.
This guide walks through the exact water-to-rice ratios for different rice types, heat control methods for both camp stoves and open fires, and the cookware characteristics that make the biggest difference. Whether you're cooking for one on a backpacking stove or feeding a group around a campfire, these methods work.
What to Look For
Cookware with Even Heat Distribution: Thin-walled pots create hot spots that scorch rice before the rest cooks through. Look for hard-anodized aluminum or heavier-gauge metals that spread heat evenly across the bottom. Non-stick coatings add insurance but aren't essential if your heat control is solid.
Proper Water Ratio for Your Elevation: The standard 2:1 water-to-rice ratio assumes sea level. Above 5,000 feet, water boils at lower temperatures and evaporates faster—you'll need closer to 2.5:1 or even 3:1 in alpine zones. Start with manufacturer guidelines and adjust based on your elevation and rice type.
Low-and-Slow Heat After the Initial Boil: The most common mistake is maintaining high heat throughout cooking. Rice needs a hard boil to start absorption, then the lowest possible simmer to finish without burning. On a camp stove, this means dialing back to barely-there flame; on a fire, it means moving your pot to cooler coals or suspending it higher.
A Tight-Fitting Lid: Steam needs to stay trapped for rice to cook evenly. Loose lids let moisture escape, forcing you to add water mid-cook and increasing burn risk. If your pot lid doesn't seal well, a sheet of aluminum foil tucked under the lid creates a better seal.
Pre-Rinsing to Remove Excess Starch: Rinsing rice before cooking isn't just for texture—it removes surface starch that can cause sticking and burning. If water supply is limited, even a single 30-second rinse makes a measurable difference.
The Right Rice Type for Camp Cooking: Long-grain white rice (jasmine, basmati) is the most forgiving for beginners—it has a wider margin of error on water ratio and cook time. Brown rice requires more water and longer cooking, increasing burn risk. Instant or parboiled rice trades texture for convenience but rarely burns.
💡 Pro Tip: Bring a small digital kitchen scale (under 2 oz) to measure rice and water by weight instead of volume. It's more accurate than eyeballing with a cup, especially when you're tired after a long day on trail.
The Universal Method: Absorption Cooking with Heat Staging
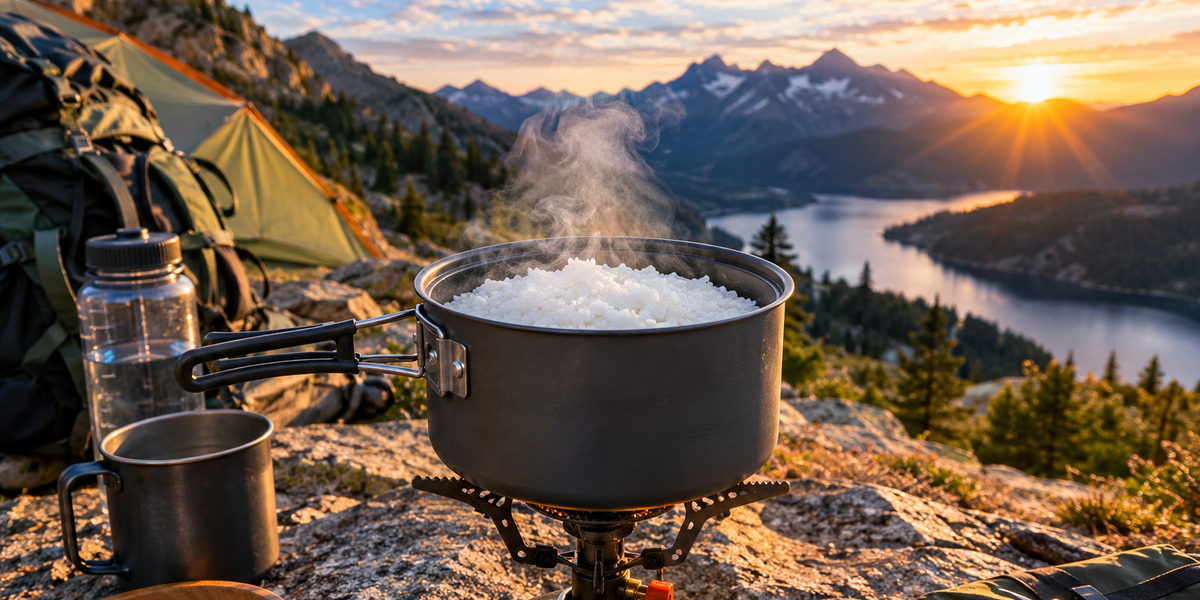
Every reliable camp rice method follows the same three-stage heat profile. First, bring water to a rolling boil over high heat—this jump-starts starch gelatinization and ensures even cooking. Second, add rice, stir once to prevent clumping, return to a boil, then immediately reduce heat to the lowest simmer your stove or fire allows. Third, cover tightly and resist the urge to lift the lid for 15-18 minutes (white rice) or 40-45 minutes (brown rice).
The key is that second stage—dropping from boil to bare simmer as fast as possible. On a canister stove, this means turning the valve to its lowest setting where the flame barely licks the pot bottom. On a campfire, move your pot from direct flame to the edge of the coal bed, or raise it on a grill grate. The goal is just enough heat to maintain steam without creating hot spots.
For backcountry use with limited fuel, we recommend a 1:1.75 ratio for jasmine rice (slightly less water than stovetop cooking at home) because camp stoves lose less moisture to evaporation than home ranges. Measure 1 cup rice to 1.75 cups water, boil, simmer covered for 16 minutes, then remove from heat and let steam in the covered pot for 5 minutes. This produces tender rice with distinct grains and zero burning.
If you're cooking over a campfire, the same method applies but requires more vigilance. Campfire heat is uneven and fluctuates as wood burns down. Start with a bed of hot coals (not active flames), place your pot on a grill grate or suspended trivet, and check the bottom every 5 minutes by gently lifting one side of the pot to peek underneath. If you see any darkening, immediately move the pot to a cooler section of the fire.
Water Ratios by Rice Type and Elevation
| Rice Type | Sea Level (0-3,000 ft) | Mid Elevation (3,000-7,000 ft) | High Elevation (7,000+ ft) |
|-----------|------------------------|--------------------------------|---------------------------|
| White (jasmine, basmati) | 1:1.75 | 1:2 | 1:2.5 |
| Brown rice | 1:2.25 | 1:2.5 | 1:3 |
| Instant/parboiled | 1:1 | 1:1.25 | 1:1.5 |
These ratios assume covered cooking on a camp stove. If cooking uncovered or over an open fire, add 0.25-0.5 cups extra water to compensate for evaporation.
MSR Alpine Stowaway Pot: The Burn-Proof Option
| Criteria | Score |
|----------|-------|
| Heat Distribution | 9/10 |
| Non-Stick Performance | 9/10 |
| Weight (1.1L size) | 7/10 |
| Value | 8/10 |
The MSR Alpine Stowaway stands out for one reason: it's nearly impossible to burn rice in it, even over a temperamental campfire. The hard-anodized aluminum base is thick enough to eliminate hot spots but light enough for backpacking (11.5 oz for the 1.1L version). The Teflon non-stick coating means rice slides out cleanly even if you slightly overcook it, and cleanup is a quick wipe with a camp towel.
We've used this pot on week-long trips where rice was a dinner staple, and the non-stick coating has held up to metal spoons and abrasive scouring without degrading. The folding handle locks securely and doesn't rattle, and the strainer lid is genuinely useful for draining pasta water or rinsing rice before cooking. At 1.1L capacity, it handles 2 cups of uncooked rice comfortably—enough for 2-3 people.
The only real limitation is size. Solo campers will find it slightly oversized, and groups of 4+ will need a larger pot for single-batch cooking. But for the 2-3 person sweet spot, this is the most foolproof rice pot we've tested.
✅ Pros:
- Hard-anodized aluminum distributes heat evenly without hot spots
- Teflon non-stick coating prevents sticking even with slight overcooking
- Strainer lid and folding handle are thoughtfully designed
- Lightweight enough for backpacking at 11.5 oz
❌ Cons:
- 1.1L capacity limits batch size for larger groups
- Non-stick coating requires gentle cleaning and no metal utensils on high heat
- Pricier than basic aluminum pots
GSI Outdoors Pinnacle Dualist: Best for Group Camping
| Criteria | Score |
|----------|-------|
| Heat Distribution | 9/10 |
| Capacity (1.8L & 2.5L) | 10/10 |
| Weight | 6/10 |
| Value | 8/10 |
If you're cooking rice for 4+ people or running a basecamp kitchen, the GSI Pinnacle Dualist is the clear choice. The set includes both a 1.8L and 2.5L pot, both with heavy-gauge aluminum construction and a ceramic-reinforced non-stick coating that outperforms standard Teflon. The larger pot easily handles 4 cups of uncooked rice (enough for 6-8 servings) without crowding, which is critical for even cooking.
The ceramic coating is noticeably more scratch-resistant than Teflon, and GSI claims it's PFOA-free for anyone concerned about non-stick chemicals. We've found the coating still performs well after a season of heavy use, including some accidental scraping with metal utensils. The pots nest together with the included strainer lids, plates, and insulated mugs, making this a complete car-camping cookset that packs efficiently.
The tradeoff is weight—the full set comes in at 1 lb 10 oz, which is fine for car camping but excessive for backpacking. The heavy-gauge aluminum also takes slightly longer to heat up, so you'll burn a bit more fuel compared to thinner pots. But for group camps where even heat and batch cooking capacity matter more than pack weight, this is the best option available.
✅ Pros:
- Heavy-gauge aluminum with ceramic non-stick eliminates hot spots
- 2.5L pot handles large rice batches for groups without burning
- Ceramic coating is more durable than standard Teflon
- Full nesting cookset includes plates and mugs
❌ Cons:
- Too heavy for backpacking at 1 lb 10 oz for the full set
- Higher price point than budget aluminum pots
- Thicker walls mean slower heating and slightly higher fuel consumption
Sea to Summit X-Pot: Packability Without Compromise
| Criteria | Score |
|----------|-------|
| Packability | 10/10 |
| Heat Distribution (base) | 8/10 |
| Ease of Use | 7/10 |
| Value | 7/10 |
The X-Pot's collapsible design is genuinely impressive—it collapses from 5.5 inches tall to just 1.5 inches, making it a game-changer for ultralight hikers with limited pack space. The hard-anodized aluminum base provides solid heat distribution comparable to traditional pots, and the food-grade silicone walls are heat-resistant up to 300°F. The graduated measurement markings inside make water ratios foolproof.
For rice cooking specifically, the X-Pot works best on camp stoves where you can control heat precisely. The silicone walls don't conduct heat, which is actually an advantage—all the cooking happens at the aluminum base, reducing the chance of rice sticking to the sides. However, this design makes it unsuitable for direct campfire use; embers or open flames can damage the silicone.
The biggest learning curve is getting comfortable with the pot's flexibility. When full of boiling water, it requires two hands to move safely, and the silicone rim gets hot enough to require a pot gripper or towel. But once you've used it a few times, these quirks become second nature. If pack space is your primary constraint and you cook exclusively on a stove, this pot delivers performance that punches well above its 7.8 oz weight.
✅ Pros:
- Collapses to 1.5 inches for ultralight packing
- Hard-anodized aluminum base distributes heat evenly
- Graduated measurements inside for precise water ratios
- Food-grade silicone is durable and heat-resistant
❌ Cons:
- Not suitable for direct campfire cooking
- Requires two hands to move when full of hot liquid
- Silicone rim gets hot and needs pot gripper
- Higher price than traditional pots of similar capacity
Toaks Titanium 750ml Pot: Ultralight Budget Choice
| Criteria | Score |
|----------|-------|
| Weight | 10/10 |
| Durability | 9/10 |
| Heat Distribution | 5/10 |
| Value | 9/10 |
At just 4.6 oz and under $33, the Toaks Titanium 750ml pot is hard to beat for weight-conscious backpackers on a budget. Titanium is nearly indestructible—it won't dent, corrode, or retain flavors—and it handles direct campfire heat without issue. For solo hikers cooking small batches (1 cup uncooked rice max), the 750ml capacity is adequate.
The catch is heat management. Titanium is a poor heat conductor compared to aluminum, which creates pronounced hot spots directly above the flame. To cook rice successfully in this pot, you need to stir frequently during the initial boil, reduce heat aggressively once simmering starts, and rotate the pot every few minutes to distribute heat. It's more hands-on than aluminum pots, but not prohibitively difficult once you develop the rhythm.
We've found that adding 0.25 cups extra water and cooking on the absolute lowest simmer compensates for the hot spots. Some ultralight hikers also place a thin aluminum foil heat diffuser between the pot and stove, though this adds a bit of weight. If you're willing to actively manage the cook process, the Toaks delivers excellent value—just don't expect the set-it-and-forget-it ease of heavier pots.
✅ Pros:
- Ultralight at 4.6 oz for backpacking
- Nearly indestructible titanium construction
- No coating to wear off over time
- Affordable compared to other titanium cookware
- Handles direct campfire heat
❌ Cons:
- Thin titanium creates hot spots that require constant stirring
- No non-stick properties—rice sticks if you're not vigilant
- Small 750ml capacity limits batch size to 1-2 servings
- Requires more active heat management than aluminum pots
Campfire-Specific Techniques
Cooking rice over an open fire requires a different approach than stove cooking because heat is uneven and fluctuates as the fire burns. The most reliable method is to wait until you have a solid bed of hot coals—not active flames—then position your pot on a grill grate or rock ring 4-6 inches above the coals. This creates indirect heat similar to a low simmer on a stove.
Start with 0.5 cups more water than you'd use on a stove to compensate for evaporation. Bring to a boil over the hottest part of the coal bed, add rice, stir once, then immediately move the pot to the edge where heat is gentler. Check the bottom of the pot every 5 minutes by carefully lifting one edge—if you see any browning, move to an even cooler spot or lift the pot higher.
For car camping where you're setting up a more permanent cooking area, consider these upgrades: a tripod with adjustable chain lets you raise and lower the pot precisely to control heat; a cast-iron Dutch oven distributes campfire heat more evenly than thin aluminum (though it's far too heavy for backpacking); and a bed of fresh coals raked from the main fire provides more consistent heat than trying to cook over the active fire itself.
If you're also working on other camp cooking skills, check out our Cast Iron vs Aluminum Camping Cookware: Which Should You Choose for Weight and Heat Distribution in 2026? guide for a deeper dive on how different metals handle campfire heat.
💡 Pro Tip: Bring a small aluminum foil heat diffuser (fold a double layer of heavy-duty foil into a 6-inch disk) to place between your pot and the campfire grate. It spreads heat more evenly and prevents hot spots—weighs less than an ounce.
Troubleshooting Common Rice-Cooking Problems
Burned Bottom, Raw Top: This is the classic hot spot problem. Your heat source is too concentrated directly under the center of the pot. Solutions: reduce heat immediately, stir gently once midway through cooking to redistribute, or switch to a pot with better heat distribution. On a campfire, move the pot away from direct coals.
Mushy, Overcooked Rice: Too much water or too long on heat. Next time, reduce water by 0.25 cups and set a timer—rice continues cooking in residual heat even after you remove it from the stove, so pull it a minute or two early.
Crunchy, Undercooked Rice: Not enough water or heat was too low to maintain a simmer. Add 0.25-0.5 cups boiling water, cover, and cook 3-5 minutes longer. At high elevations, you may need up to 1 extra cup of water total.
Rice Sticking to Pot (But Not Burning): Usually caused by insufficient rinsing before cooking or lifting the lid too early, which releases steam. Rinse rice thoroughly before cooking, and don't peek until the full cook time is complete. A small pat of butter or oil added with the water also helps prevent sticking.
Frequently Asked Questions
Can I use instant rice to avoid burning problems?
Yes, instant or parboiled rice (like Minute Rice) is pre-cooked and then dehydrated, which means it only needs to rehydrate in boiling water for 5-10 minutes—far less time for burning to occur. The tradeoff is texture; instant rice is mushier and less flavorful than regular rice. But for quick backcountry meals where you're prioritizing speed and fuel efficiency, instant rice is a solid choice. Use a 1:1 water ratio and remove from heat as soon as the water is absorbed.
Should I stir rice while it's cooking to prevent burning?
No, resist the urge to stir once you've returned the pot to a simmer. Stirring releases starch and breaks up rice grains, leading to mushy, sticky rice. The only exception is one gentle stir immediately after adding rice to boiling water to prevent clumping. After that, leave the lid on and trust the process. If you're worried about burning, the solution is lower heat or a better pot—not stirring.
How do I clean burned rice off my camp pot?
Fill the pot with water, add a tablespoon of baking soda or a squirt of biodegradable camp soap, and bring to a boil. Let it simmer for 10 minutes—the heat will loosen the burned layer. Dump the water away from your campsite (following Leave No Trace principles), then scrub with a non-abrasive pad. For stubborn burns, let the pot soak overnight with soapy water. Avoid using steel wool on non-stick coatings as it will damage the surface.
Can I cook rice and dehydrated meals together to save fuel?
Not recommended. Rice and most dehydrated meals have different water absorption rates and cook times, which means one will be overcooked or undercooked. Cook rice first, then use the same pot for dehydrated meals if you want to maximize fuel efficiency. Alternatively, cook rice in bulk at the start of your trip and reheat portions in lightweight tortillas or mix with dehydrated ingredients after both are cooked separately.
What's the best way to pack uncooked rice for backpacking?
Pre-measure your rice into individual portions (typically 0.5-1 cup per person per meal) and seal in small zip-top bags or reusable silicone bags. Squeeze out as much air as possible to save pack space. Label each bag with the rice type and water ratio for easy reference at camp. Some hikers pre-rinse rice at home and let it dry before packing to save water on trail, though this isn't necessary if water is available at your campsite.
Final Thoughts
Cooking perfect rice in the backcountry isn't about expensive gear or complicated techniques—it's about understanding how heat interacts with your cookware and adjusting your water ratio and simmer intensity accordingly. The universal method (boil, then barely simmer covered for 15-18 minutes) works across nearly every camp stove and cookware combination once you dial in the right water amount for your elevation.
If burning is a recurring problem, the single best upgrade is a pot with even heat distribution—hard-anodized aluminum or a non-stick coating makes a measurable difference compared to thin, bare metal. But even with basic gear, dropping your heat to the lowest possible simmer and resisting the urge to lift the lid will solve 90% of burning issues.
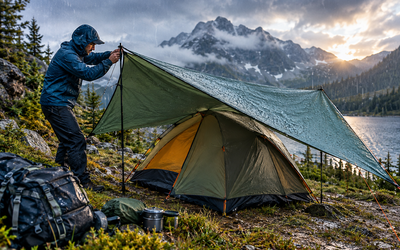
For more camp cooking setup tips, our guide on How to Set Up a Campsite in Rain Without Getting Your Gear Wet: Tarp and Tent Pitching Order That Works covers organizing your cooking area for efficiency in challenging conditions. Master these fundamentals and rice becomes one of the most reliable, fuel-efficient meals in your backcountry rotation.
Editor's Choice
MSR Alpine Stowaway Pot — The hard-anodized aluminum and non-stick coating eliminate hot spots, making this the most foolproof option for beginners and experienced campers alike who want consistently perfect rice without constant monitoring.
GSI Outdoors Pinnacle Dualist Cookset — Best choice for group camping where you need to cook 4+ cups of rice in a single batch; the heavy-gauge aluminum and ceramic coating prevent burning even over uneven campfire heat.
Toaks Titanium 750ml Pot — Best value for ultralight backpackers willing to actively manage heat; at 4.6 oz and under $33, the weight-to-durability ratio is unbeatable for solo cooking.