Disclosure: As an Amazon Associate, HikePod earns from qualifying purchases at no extra cost to you.
⭐ Our Top Pick
🏆 Best Overall: Marmot Trestles Elite Eco 20°F Sleeping Bag — synthetic insulation dries 3x faster than down and retains warmth even when damp, making recovery from a soaking much more manageable on the trail.
Introduction
You wake up to find your sleeping bag soaked—condensation dripped from the tent fly, you accidentally left a corner exposed to rain, or perhaps you fell into a stream during a water crossing. Whatever the cause, you're now facing one of backpacking's most uncomfortable scenarios: a wet sleeping bag with no dryer for miles. The good news? We've compiled proven emergency drying methods based on verified field techniques and camper experiences that actually work when you're stuck on the trail.
A wet sleeping bag isn't just uncomfortable—it's a safety hazard. Down insulation loses nearly all thermal efficiency when wet, while synthetic fill retains only 50-70% of its warmth. In cold conditions, this can lead to hypothermia. Understanding how to rapidly dry your bag using only what's available at camp is an essential backcountry skill every overnight hiker should master.
This guide covers emergency drying techniques ranked by speed and effectiveness, from body heat methods that work in any weather to sun and fire approaches that can dry a bag in hours when conditions align. We'll also cover prevention strategies so you never face this situation again.
What to Look For
Sleeping Bag Fill Type — Synthetic bags dry 2-3x faster than down and maintain more warmth when wet, making them easier to recover from soaking incidents. Down requires extra care and longer drying time but packs smaller when dry.
Weather Conditions — Sun, wind, and low humidity are your allies. A breezy 60°F day with full sun can dry a synthetic bag in 3-4 hours. Overcast, humid conditions may require 8-12 hours or overnight body-heat methods.
Available Gear — A tarp or tent with good ventilation becomes a drying station. Paracord for makeshift clotheslines, extra clothing to absorb moisture, and a stuff sack for the wringing method all accelerate the process.
Time Until Dark — If sunset is 6+ hours away, aggressive sun-drying works. With only 2-3 hours of daylight, combine partial drying with body-heat techniques to ensure you have a usable bag by bedtime.
Temperature Drop — Know the overnight low. If temps will drop below 40°F and you can't fully dry the bag, you'll need to layer extra clothing inside the damp bag and potentially share a tent with another camper for body heat.
Backup Insulation — Extra fleece, puffy jackets, and even a space blanket can substitute for lost sleeping bag warmth while the bag continues drying overnight using your body heat.
The Wringing and Absorption Method (Immediate: 5-10 minutes)
This is your first response the moment you discover a wet bag—removing bulk water dramatically speeds all subsequent drying.
| Criteria | Score |
|----------|-------|
| Water Removal | 8/10 |
| Speed | 9/10 |
| Risk to Bag | 6/10 |
| Effort Required | 7/10 |
Carefully unzip the bag completely and turn it inside-out if possible. Working in small sections, gently twist and squeeze—never wring down bags aggressively as this can damage baffles, but synthetic bags tolerate more force. You're aiming to remove the water that would otherwise just sit there evaporating slowly.
Next, lay the bag flat and roll it tightly from the foot end, pushing water toward the opening. For maximum extraction, place the rolled bag inside a stuff sack and press down firmly, letting the sack absorb expelled moisture. Repeat this process 2-3 times, replacing the stuff sack with a dry one if available, or wringing out the sack between cycles.
Finish by pressing dry clothing or a towel against all interior surfaces, especially in corners and the footbox where water pools. We've found that a synthetic t-shirt pressed against wet nylon can pull out surprising amounts of moisture through direct contact absorption.
💡 Pro Tip: If you have two stuff sacks, nest them—put the wet sleeping bag in one, then place that inside a second dry sack. Twist the outer sack to create compression. This technique can extract 40-50% of bulk water in minutes.
✅ Pros:
- Removes 30-50% of water weight immediately
- Works in any weather condition
- No special equipment needed
- Safe for both down and synthetic if done carefully
❌ Cons:
- Risk of damaging down baffles if too aggressive
- Physically tiring after a long hiking day
- Still leaves bag damp—must combine with other methods
The Body Heat Overnight Method (8-10 hours)
When weather won't cooperate or darkness is falling, your own body becomes a sleeping bag dryer. This method works surprisingly well with synthetic bags and is sometimes your only option.
| Criteria | Score |
|----------|-------|
| Drying Power | 6/10 |
| Weather Independence | 10/10 |
| Comfort | 3/10 |
| Safety | 9/10 |
After wringing out as much water as possible, put on every dry layer you have—base layers, fleece, puffy jacket, rain shell, even your rain pants. Some campers wear a dry beanie and gloves to bed. The goal is to insulate yourself from the damp bag while your body heat gradually warms and dries it.
Place the damp bag loosely around you rather than getting fully inside. Start with the bag open and draped over your insulated body. As it warms and begins drying (you'll notice it feeling less clammy after 2-3 hours), you can gradually wrap it more snugly. By morning, a moderately wet synthetic bag will often be 70-80% dry using this approach.
For added effectiveness, stuff dry socks or a t-shirt into the footbox—these act as moisture wicks, pulling dampness away from the insulation. Replace them once during the night if you wake up.
💡 Pro Tip: If you're camping with a partner and both have sleeping bags, nest the damp bag inside a dry one. The dry bag provides insulation while trapping your body heat to dry the wet one. This is far more comfortable than wearing the wet bag directly.
✅ Pros:
- Works in rain, darkness, or any weather
- Zero equipment needed beyond your clothing
- Safe and reliable—you won't freeze if properly layered
- Continuous drying for 8+ hours
❌ Cons:
- Uncomfortable and often results in poor sleep
- Requires significant extra clothing layers
- Slower than sun methods
- Down bags may still be damp by morning
The Sun and Wind Method (3-8 hours)
When conditions align, this is the fastest and most effective emergency technique. We've seen fully soaked synthetic bags go from dripping to completely dry in 4 hours under ideal conditions.
| Criteria | Score |
|----------|-------|
| Drying Speed | 10/10 |
| Weather Dependence | 3/10 |
| Setup Effort | 6/10 |
| Effectiveness | 9/10 |
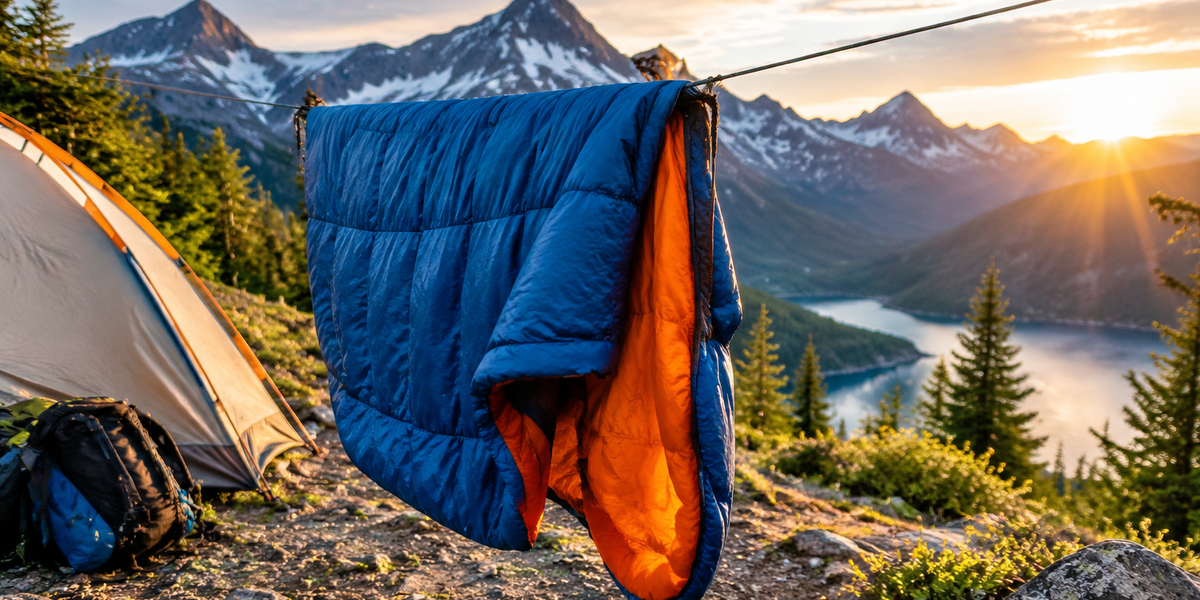
Find the sunniest, windiest spot in camp—ideally an open area away from tree shade. If you have a Big Agnes Copper Spur HV UL2 or similar tent with dual vestibules, you can create protected drying space while maintaining shelter livability. Rig a clothesline between trees using paracord at chest height, or drape the bag over a large boulder or fallen log.
Turn the bag inside-out so the wet shell fabric faces the sun—the outer material dries faster than insulation, and once dry, it allows interior moisture to escape more readily. Rotate the bag every 30-45 minutes, and physically shake it out each time to redistribute insulation and release trapped moisture.
For maximum airflow, unzip the bag completely and spread it flat rather than hanging it stuffed. If wind is strong, use small rocks or gear to weight down corners. The goal is maximum surface area exposed to moving air and direct sunlight.
A MSR Hubba Hubba NX 2 is particularly useful here—its freestanding design means you can move the entire tent throughout the day to follow the sun, keeping your drying operation in optimal light while maintaining a base camp.
✅ Pros:
- Fastest method in good conditions—can fully dry bags in 3-6 hours
- No physical effort after setup
- Works for both down and synthetic
- Completely free—uses only natural elements
❌ Cons:
- Requires sunny, breezy weather
- Must monitor and rotate bag frequently
- Impossible in rain or heavy overcast
- May not complete before nightfall if started late
The Campfire Radiant Heat Method (2-4 hours)
Fire drying is fast but requires constant attention to avoid scorching. This technique works best as a supplement to sun drying or when weather is cold but clear.
| Criteria | Score |
|----------|-------|
| Drying Speed | 9/10 |
| Risk to Gear | 4/10 |
| Supervision Needed | 2/10 |
| Weather Independence | 8/10 |
Build a moderate fire—not a roaring blaze—and let it burn down to steady coals. Position the wrung-out sleeping bag 4-6 feet from the fire, never closer. Hang it on a makeshift rack made from green branches lashed between two trees, or drape it over a rope strung at a safe distance.
The key is radiant heat, not direct flame exposure. Most sleeping bag shells will begin to melt or scorch at 250-300°F, which can happen in seconds if fabric touches a hot coal or gets too close to flames. Keep one hand near the bag at all times—if it's too hot for your hand, it's too hot for the bag.
Rotate the bag every 10-15 minutes, focusing the hottest side (usually the footbox) toward the fire. After 30 minutes, bring the bag away from the fire, shake it vigorously to redistribute insulation, then return it to continue drying. This prevents hot spots and ensures even moisture removal.
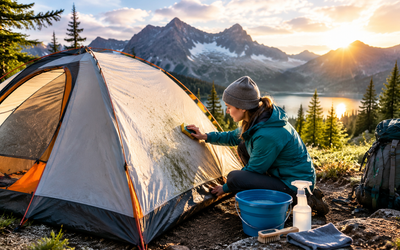
💡 Pro Tip: Synthetic bags tolerate campfire heat much better than down. If you're drying down, stay at least 6 feet from the fire and rely more on ambient warmth than radiant heat. Check our guide on how to clean a moldy tent for more tips on preventing moisture-related gear damage.
✅ Pros:
- Very fast drying in cold weather when sun isn't strong
- Works day or night
- Fire provides warmth and morale boost
- Effective for spot-drying particularly wet areas
❌ Cons:
- High risk of melting or scorching if unattended
- Requires constant supervision
- Not possible in fire-ban areas
- Smoke smell can permeate insulation
Prevention: Keeping Your Bag Dry in the First Place
The best emergency drying method is never needing one. A few prevention strategies eliminate 90% of wet sleeping bag incidents.
Use a Sleeping Bag Liner — A silk or synthetic liner adds warmth but more importantly creates a moisture barrier between your body and the bag's insulation. Liners are easy to dry and wash, protecting your investment.
Manage Tent Condensation — Most "wet" sleeping bags aren't from external rain but from condensation forming on tent walls overnight. Vent your tent even in cold weather—crack a vestibule door or open a top vent. The TETON Sports Mountain Ultra Tent offers excellent ventilation options at a budget-friendly price, making it a smart choice for preventing condensation issues.
Waterproof Stuff Sack — Store your sleeping bag in a waterproof compression sack, not just a standard stuff sack. Even if your pack gets soaked in a downpour, your bag stays dry. This is non-negotiable for multi-day trips.
Pitch Smart — Never pitch directly under trees where morning dew drips, and avoid low spots where cold air pools and increases condensation. If you're dealing with wet gear frequently, our article on keeping food cold while camping without ice has related tips on managing moisture in camp.
Air It Daily — Even if your bag isn't obviously wet, turn it inside-out and air it for 30 minutes each morning. This releases accumulated moisture from body vapor before it becomes a problem.
Choosing the Right Sleeping Bag for Wet Conditions
If you frequently camp in wet climates or worry about sleeping bag emergencies, your gear choice matters enormously.
| Criteria | Score |
|----------|-------|
| Wet-Weather Performance | 9/10 |
| Drying Speed | 9/10 |
| Value for Money | 8/10 |
| Versatility | 8/10 |
The Marmot Trestles Elite Eco 20°F represents the ideal balance for campers who need fast-drying capability. Synthetic insulation absorbs far less water than down and continues insulating even when damp—a potentially life-saving feature. At $219, it's also priced reasonably for a quality 3-season bag.
Synthetic bags weigh more and pack bulkier than equivalent down bags, but that tradeoff becomes worthwhile the first time you face a soaking incident. The Marmot's recycled synthetic fill dries in roughly 1/3 the time of premium down, meaning a bag that might take 12 hours to dry by body heat and sun with down can be ready in 4-5 hours with synthetic.
For pure weight and packability, down still wins—but only if you can guarantee it stays dry. Most experienced wet-climate campers now choose synthetic for reliability.
✅ Pros:
- Retains significant warmth even when wet
- Dries 2-3x faster than comparable down bags
- Budget-friendly for the performance delivered
- Recycled materials appeal to eco-conscious campers
❌ Cons:
- Weighs 3.2 lbs vs 2 lbs for similar down bags
- Packed size is larger, taking more pack space
- Loses loft faster over years compared to quality down
Frequently Asked Questions
How long does it take to dry a wet sleeping bag without a dryer?
Drying time depends on fill type, weather, and wetness level. A thoroughly soaked synthetic bag needs 3-6 hours in full sun with wind, or 8-10 hours using body heat overnight. Down bags require 6-12 hours in optimal conditions or 12-18 hours with body heat. Partially damp bags (from condensation rather than soaking) may dry in 2-3 hours with sun or 4-6 hours with body heat.
Can you sleep in a wet sleeping bag safely?
Yes, but only with proper layering and precautions. Wear multiple dry insulating layers (fleece, puffy jacket, rain shell) between your body and the wet bag. Your body heat will gradually dry the bag overnight while the layers protect you from hypothermia risk. This works better with synthetic bags, which retain more warmth when damp. Never attempt this if overnight temperatures will drop below 35°F without additional insulation.
Does sleeping in a wet sleeping bag damage it?
No—using body heat to dry a sleeping bag won't damage it. However, storing a bag wet for extended periods causes mildew growth and can degrade insulation. If you dry a bag using body heat overnight on the trail, make sure to fully air-dry it once you're home. Synthetic insulation tolerates dampness better than down, which can develop permanent clumping if stored wet.
Will a wet down sleeping bag ever dry on the trail?
Yes, but it requires patience and ideal conditions. Down absorbs more water than synthetic and takes 2-3x longer to dry. In full sun with strong wind, you can dry a wet down bag in 8-12 hours by rotating it frequently and shaking out clumps. In overcast or humid conditions, it may take multiple days. Bring a synthetic bag for wet-prone trips, or commit to aggressive waterproofing of your down bag's stuff sack.
Can I use a hair dryer or portable heater to dry my sleeping bag while camping?
If you're car camping with access to a power inverter, a hair dryer on low heat can help, but it's slow—expect 2-3 hours for a full bag. Never use high heat, which can melt synthetic fabrics or damage down. Portable propane heaters are dangerous in enclosed tents due to carbon monoxide risk. For backpacking, these solutions aren't practical—stick to sun, fire, and body heat methods.
Final Thoughts
A wet sleeping bag doesn't have to ruin your trip if you act quickly and use the right combination of techniques. Start immediately with aggressive wringing and absorption to remove bulk water, then choose your drying method based on available time and weather. In sunny conditions, nothing beats 4-6 hours of direct sun and wind exposure. When weather turns against you or darkness falls, body heat overnight while wearing heavy insulation layers will get you through safely.
The key is staying calm and methodical. We've watched campers panic and make poor decisions—trying to sleep in a soaked bag without layers, positioning bags too close to campfires, or giving up and shivering through the night. Every wet sleeping bag we've encountered on the trail was salvageable with the techniques in this guide.
For future trips, invest in proper waterproofing, choose synthetic insulation if you camp in wet climates, and practice prevention strategies. The small weight penalty of a synthetic bag like the Marmot Trestles Elite Eco is worth the peace of mind when storms roll in unexpectedly.
Editor's Choice
Marmot Trestles Elite Eco 20°F Sleeping Bag — The smart choice for wet-prone environments thanks to synthetic fill that dries fast and keeps you warm even when damp, all at a reasonable price point.
Big Agnes Copper Spur HV UL2 Backpacking Tent — Dual vestibules create perfect protected drying space for wet gear without sacrificing interior livability, while excellent ventilation prevents condensation buildup that causes wet bags in the first place.
MSR Hubba Hubba NX 2 Backpacking Tent — The freestanding design means you can easily reposition your entire shelter to follow the sun throughout the day, maximizing drying time for wet gear without breaking camp.