Disclosure: As an Amazon Associate, HikePod earns from qualifying purchases at no extra cost to you.
⭐ Our Top Pick
🏆 Best Overall: Sawyer Squeeze Water Filter System — three ounces, lifetime warranty, and 0.1-micron filtration make it the best all-around water filter for hikers crossing natural water sources.
💰 Best Value: LifeStraw Personal Water Filter — under $18 and zero learning curve, this iconic straw filter is hard to beat for day hikers who want reliable protection without spending much.
Introduction
There's a moment every backcountry hiker eventually faces: you're standing at the edge of a rushing stream with no bridge in sight, your trail continuing on the other side. The water looks manageable — maybe knee-deep — but the current is pushing harder than it looks, and the rocks beneath the surface are slick with algae. What you do next matters more than almost any other decision you'll make on that hike.
Stream crossings cause a disproportionate share of serious backcountry accidents. Cold water numbs your legs faster than you expect, wet rocks are treacherous underfoot, and even a modest current can knock an unprepared hiker off balance. We've crossed hundreds of streams across the Sierra Nevada, the Pacific Northwest, and Patagonia, and we've learned — sometimes the hard way — what separates a confident crossing from a dangerous one.
This guide covers everything: how to read a crossing before you commit, step-by-step technique for solo and group crossings, what gear actually helps, and how to safely drink from the streams you cross. By the end, you'll have the knowledge to make smart decisions at the water's edge — and to move through wild terrain with confidence.
What to Look For
Before you wade in, assess the crossing on these six dimensions. A few minutes of scouting is always worth it.
- Width and depth — Wider crossings are often shallower. Narrow choke points look quicker but funnel the current into a more powerful, concentrated flow. Aim for the widest, shallowest section you can find.
- Current speed — Toss a stick in and watch it. Fast-moving water above knee height is genuinely dangerous for most adults, even experienced hikers. If it's moving that fast, keep scouting upstream or downstream for a better spot.
- Bottom visibility and substrate — Clear water over sandy or gravelly bottom is ideal. Murky water hides obstacles. Dark, mossy rocks are almost always slippery. Big boulders can trap a foot or leg in a current.
- Entry and exit points — You need a clean, stable bank on both sides. A good crossing with a crumbling, steep exit bank is still a bad crossing. Check both shores before committing.
- Downstream hazards — If you fall, where does the current take you? Scout 50–100 meters downstream. Waterfalls, log jams, and undercut banks are the features that turn a stumble into an emergency.
- Time of day and season — Snowmelt-fed streams peak in the afternoon on warm spring and summer days. Crossing in the morning — before the sun has melted snow at elevation — can make the same stream dramatically safer and shallower.
💡 Pro Tip: If a crossing looks sketchy, it probably is. Walk upstream or downstream for 10–20 minutes before committing. A safer route almost always exists — and the extra distance is far better than a cold, dangerous fall.
Water Filters for Trail Crossings
Every time you cross a natural water source, you're also standing next to one of the best hydration opportunities on the trail. Waterborne pathogens like Giardia and Cryptosporidium are invisible and can ruin your next week. Carrying a filter means every crossing is also a resupply point.
Sawyer Squeeze Water Filter System
| Criteria | Score |
|---|---|
| Filtration Level | 9/10 |
| Flow Rate | 8/10 |
| Weight & Packability | 10/10 |
| Value for Money | 9/10 |
The Sawyer Squeeze Water Filter System is the filter we reach for on every multi-day trip. At just 3 oz, it disappears into any hip belt pocket, and its 0.1-micron hollow fiber membrane blocks bacteria, protozoa, and microplastics without slowing you down at the stream bank. Squeeze water through into your bottle or use the included pouch — it's versatile, fast, and backed by a lifetime warranty. The only gap is virus coverage, which matters more in international or heavily-trafficked backcountry than in most North American wilderness.
✅ Pros:
- Filters to 0.1 micron — removes bacteria, protozoa, and microplastics
- Only 3 oz — genuinely one of the lightest filters on the market
- Lifetime warranty and backflushable for extended field life
❌ Cons:
- Does not filter viruses — pair with chemical tablets when traveling internationally
- Squeeze pouches wear out faster than hard-sided bottles
LifeStraw Personal Water Filter
| Criteria | Score |
|---|---|
| Filtration Level | 8/10 |
| Ease of Use | 10/10 |
| Weight & Packability | 10/10 |
| Value for Money | 10/10 |
Few pieces of gear have as much name recognition as the LifeStraw Personal Water Filter, and the 124,000+ Amazon reviews aren't just hype — this thing works. It removes 99.9999% of bacteria and parasites, requires zero setup, and you can literally dip it into a stream mid-crossing and drink. For day hikers or as a stripped-down emergency backup, it's almost impossible to argue against at under $18. The limitation is that you can't fill a bottle with it, so it works best for hikers who are happy to drink directly at the source.
✅ Pros:
- No setup, no maintenance — dip and drink instantly
- Extremely affordable and widely available
- Featherlight at just 2 oz
❌ Cons:
- Cannot fill a water bottle or hydration reservoir
- No virus protection — a limitation in some international destinations
Aquatabs 49mg Water Purification Tablets
| Criteria | Score |
|---|---|
| Purification Coverage | 9/10 |
| Weight & Packability | 10/10 |
| Ease of Use | 8/10 |
| Value for Money | 10/10 |
The Aquatabs 49mg Water Purification Tablets are the ultralight hiker's safety net. A 30-pack weighs next to nothing and costs less than a trail lunch. Drop one tablet into a liter of filtered or settled water, wait 30 minutes, and you've got coverage against bacteria, protozoa, and — critically — viruses, which most physical filters miss. We always carry a few tabs alongside our Sawyer Squeeze for exactly that reason. The wait time is the only real friction.
✅ Pros:
- Broadest pathogen coverage, including viruses
- Virtually weightless — no reason not to carry them
- No iodine aftertaste
❌ Cons:
- 30-minute wait time is inconvenient when you're thirsty and moving
- No protection against chemical or heavy metal contamination
How to Actually Cross: Techniques That Work
The Solo Crossing
For most moderate crossings, solo technique is straightforward — but the details matter.
- Unbuckle your hip belt and loosen your sternum strap before entering. If you fall, you need to ditch your pack instantly. A pack pinning you underwater is a life-threatening situation.
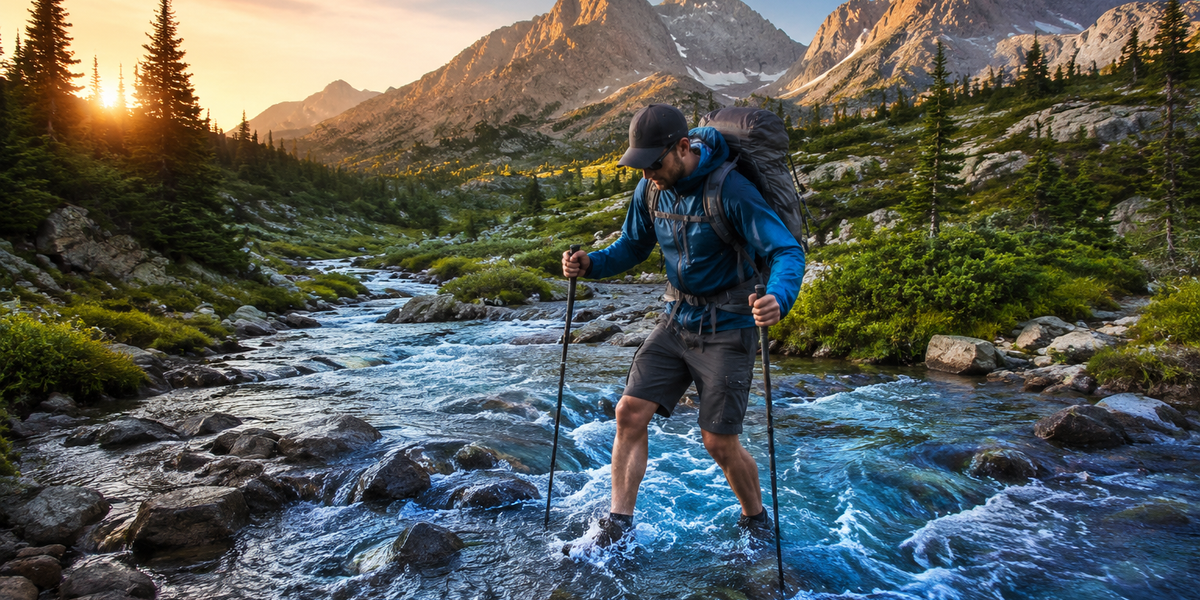
- Use a trekking pole or sturdy stick as a third point of contact. Plant it upstream on your entry side, creating a tripod with your two legs. Move one point at a time — never two simultaneously.
- Face upstream or at a 45-degree angle to the current. This lets you see what's coming and gives you more control than facing directly across.
- Shuffle sideways rather than crossing your feet. Crossing your feet destroys your balance base at the exact moment you need it most.
- Take small, deliberate steps and feel each footfall before committing your weight. Speed is not your friend here.
💡 Pro Tip: Before crossing, loosen your boot laces slightly and remove your gaiters if you're wearing them. Water-filled boots are heavy, but a boot that locks onto a submerged rock can trap your foot in a dangerous current. Loose laces let you kick free if needed.
The Group Crossing
Two or more hikers can cross linked together for added stability — but technique matters.
- The line method: Stand in a single-file line perpendicular to the current, each hiker gripping the shoulder straps or shoulders of the person in front. The strongest hiker leads. Move together on a count.
- The huddle method: Two or three hikers stand in a tight cluster, arms around each other's shoulders, facing inward. Shuffle as a unit across the current. More stable than a line for very strong flows.
When to Turn Around
This is the most important skill of all. Turn back if:
- The water is above mid-thigh and moving fast
- You cannot clearly see the bottom
- There are hazardous features downstream (waterfalls, log jams)
- Any member of your group is uncomfortable or hesitant
- It's late afternoon and you're crossing a snowmelt stream — wait for morning
No summit, no campsite, and no schedule is worth a dangerous crossing. Come back the next morning, wait for the water to drop, or find another route.
Frequently Asked Questions
Should I take my boots off to cross a stream?
Generally, no. Wet boots are annoying, but bare feet or socks alone offer almost no protection from sharp rocks and give you far less traction on slippery surfaces. The exception is a very short, slow, sandy-bottomed crossing where visibility is perfect. Many experienced hikers carry a pair of lightweight water shoes specifically for crossings on longer expeditions.
How do I know if a stream is safe to drink from?
You can't tell by looking. Clear, cold, fast-moving mountain streams can still carry Giardia, Cryptosporidium, and other pathogens. Always treat water from natural sources with a filter, chemical tablets, or both before drinking.
What should I do if I fall in during a crossing?
Ditch your pack if you can (this is why you unbuckle before crossing). Roll onto your back, feet downstream, toes up — this is the defensive swimming position. Use your feet to push off rocks and steer toward shore. Don't fight the current; angle toward the bank at 45 degrees and let the water do most of the work.
Is it safer to cross in the morning or afternoon?
Morning is almost always safer for snowmelt-fed streams. Overnight temperatures refreeze meltwater at elevation, and stream levels drop accordingly. By early afternoon on a warm day, the same stream can be a foot deeper and significantly more powerful.
Do trekking poles really help with stream crossings?
Absolutely. A single pole on your upstream side acts as a third leg, dramatically improving your stability on uneven, slippery stream beds. Extend your pole a few inches longer than normal for better reach and a lower center of gravity.
Final Thoughts
Safe stream crossings come down to three things: reading the water before you commit, using sound technique when you cross, and knowing when to walk away. The skills are learnable, and they compound — the more crossings you do with good habits, the more confident and capable you become in wild terrain.
Don't forget that every stream you cross is also a water source. A lightweight filter or a pocket-sized set of purification tablets means you never have to carry more water than you need. It's one of those small investments that pays off on every single trip.
Editor's Choice
Sawyer Squeeze Water Filter System — the best all-around filter for hikers who cross natural water sources regularly: ultralight, fast, and covered by a lifetime warranty.
LifeStraw Personal Water Filter — perfect for day hikers or as a zero-weight backup that lets you drink directly from any stream you're already crossing.
Aquatabs 49mg Water Purification Tablets — the smartest ultralight insurance policy on the market, adding virus protection to any physical filter system for under $8.