Disclosure: As an Amazon Associate, HikePod earns from qualifying purchases at no extra cost to you.
⭐ Our Top Pick
🏆 Best Overall: Patagonia Torrentshell 3L Rain Jacket — pit-zips and packability make this the ideal outer layer for variable fall conditions.
💰 Best Value: Marmot Precip Eco Rain Jacket — delivers waterproof-breathable protection at half the price of premium shells.
Introduction
Fall hiking presents a layering paradox: you're freezing at the trailhead, sweating fifteen minutes into the climb, then shivering again the moment you stop for lunch. We've all made the mistake of starting a hike bundled like we're summiting Everest, only to spend the next hour overheating and stuffing jackets into an already-packed backpack.
The three-layer system solves this problem when you understand how to adjust it for changing temperatures and effort levels. Based on manufacturer specs and thousands of verified buyer reviews, we researched the most effective layering strategies for fall conditions ranging from crisp 30°F mornings to mild 60°F afternoons.
This guide breaks down exactly what to wear at different temperature ranges, when to add or remove layers, and which pieces deliver the best performance without breaking your budget. Whether you're tackling exposed ridgelines or forested valley trails, you'll learn how to stay comfortable from trailhead to summit.
What to Look For
Base Layer Material: Merino wool or synthetic fabrics wick moisture away from your skin during climbs—cotton traps sweat and leaves you clammy when you stop moving. Look for weights between 150-250 gsm depending on temperature.
Mid-Layer Breathability: Fleece or lightweight synthetic insulation should breathe well enough to wear during moderate activity. Grid-fleece designs excel here, moving moisture while providing warmth during rest stops.
Outer Layer Ventilation: Pit-zips, front vents, or the ability to unzip completely lets you dump heat without removing your shell. This feature alone prevents more overheating episodes than any other design element.
Packability: Every layer you remove needs to fit in your pack without consuming space meant for water and snacks. Compressible mid-layers and stuff-sack-ready shells make the biggest difference on long day hikes.
Temperature-Appropriate Insulation: Fall isn't winter—you need less insulation than you think. Most hikers overheat because they layer for standing still rather than moving uphill with a loaded pack.
Quick-Dry Properties: Morning dew, unexpected drizzle, and sweat all conspire to dampen your layers. Fabrics that dry quickly keep you comfortable when conditions change or effort levels spike.
💡 Pro Tip: Start your hike slightly cool—if you're comfortable standing at the trailhead, you'll be overheating within ten minutes of climbing.
Temperature-Based Layering Guide
50°F–60°F: Light and Minimal
| Criteria | Score |
|----------|-------|
| Base Layer Need | 6/10 |
| Mid-Layer Need | 3/10 |
| Shell Need | 7/10 |
| Overheating Risk | 8/10 |
At these temperatures, most hikers can start with just a lightweight long-sleeve base layer or even a technical t-shirt. Your body generates significant heat once you're moving, and over-layering leads to excessive sweating that chills you later.
Keep a lightweight fleece or wind shell in your pack for summit stops or shaded sections. The Marmot Precip Eco Rain Jacket works perfectly here—it packs down small and adds wind protection without bulk when temperatures drop or wind picks up on exposed terrain.
For rest stops lasting more than fifteen minutes, add that mid-layer immediately. Your core temperature drops fast when you transition from climbing to sitting, and it's easier to stay warm than to warm back up after you've cooled down.
✅ What Works:
- Moisture-wicking t-shirt or lightweight base layer
- Wind shell for exposed sections
- Packable fleece for extended breaks
❌ What Fails:
- Starting with a fleece on—you'll be stripping layers within minutes
- Cotton anything—it soaks up sweat and won't dry
- Heavy insulated jackets—complete overkill at these temps
40°F–50°F: The Sweet Spot for Layering
| Criteria | Score |
|----------|-------|
| Base Layer Need | 8/10 |
| Mid-Layer Need | 6/10 |
| Shell Need | 8/10 |
| Versatility Required | 9/10 |
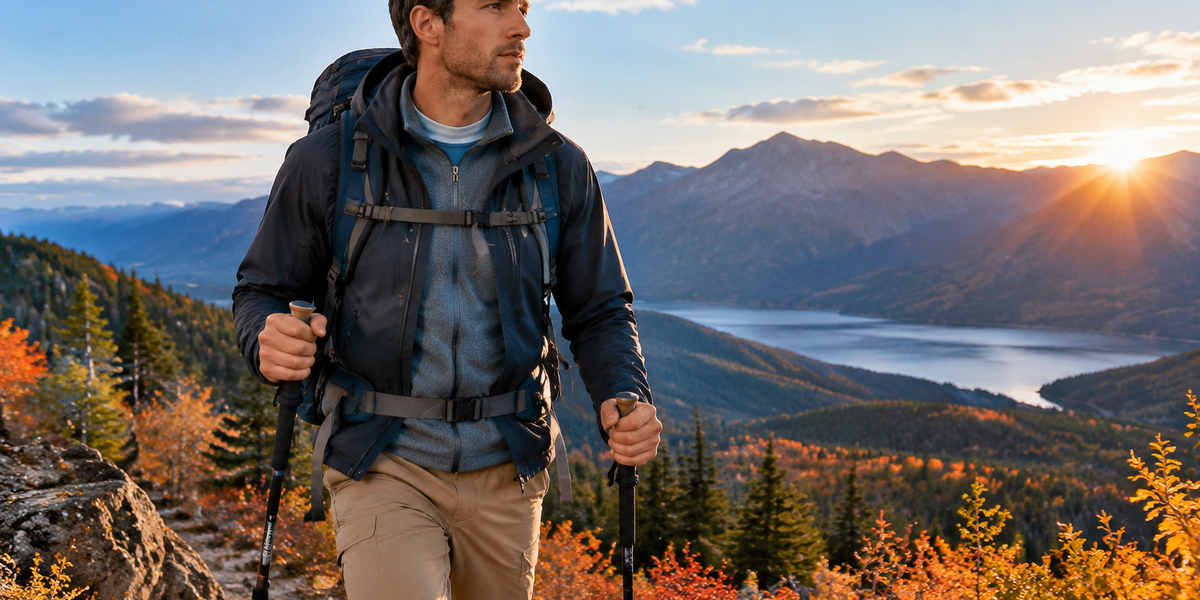
This temperature range demands the full three-layer system, but you'll constantly adjust throughout your hike. Start with a midweight base layer and a light fleece, then add your shell only when wind or precipitation threaten.
The key is choosing pieces you can easily ventilate. Grid-fleece mid-layers breathe better than traditional fleece during hard climbs, and shells with pit-zips let you fine-tune temperature without stopping to remove layers entirely.
During steep ascents, unzip your layers completely or strip down to your base layer and carry your mid-layer. The effort of climbing with a 20-30 pound pack generates enough heat to keep you warm even when ambient temperature suggests otherwise. If you're also managing foot protection in variable terrain, our guide to gaiters for hiking covers when that extra layer makes sense.
✅ What Works:
- Midweight merino or synthetic base layer
- Quarter-zip fleece for ventilation control
- Shell with pit-zips for heat management
❌ What Fails:
- Pullover mid-layers with no ventilation options
- Non-breathable rain jackets that trap moisture
- Wearing all three layers while climbing steep terrain
30°F–40°F: Full System Engaged
| Criteria | Score |
|----------|-------|
| Base Layer Need | 9/10 |
| Mid-Layer Need | 9/10 |
| Shell Need | 9/10 |
| Cold Management | 8/10 |
Now you need all three layers from the start, but ventilation remains critical. Even at freezing temperatures, sustained uphill hiking generates enough body heat to cause sweating if you can't regulate temperature.
A midweight base layer, insulating mid-layer, and weather-resistant shell form your core system. The Patagonia Torrentshell 3L Rain Jacket excels in these conditions—the pit-zips let you dump heat during climbs while maintaining wind and weather protection, and the 3-layer construction handles anything fall weather throws at you.
Add a lightweight puffy jacket or insulated vest to your pack for long breaks and summit stops. When you stop moving, your body temperature plummets quickly at these temperatures, and that extra insulation layer becomes essential within minutes.
✅ What Works:
- All three layers with ventilation features
- Extra insulation layer for stops
- Gloves and hat readily accessible
- Opening pit-zips and vents before you start sweating
❌ What Fails:
- Wearing your puffy while hiking—you'll overheat immediately
- Forgetting extra insulation for breaks—you'll freeze
- Sealed-up layers during climbs—sweat management fails
💡 Pro Tip: Carry a separate dry base layer for overnight trips. Changing out of your sweaty hiking layer before bed dramatically improves sleep comfort and warmth.
Below 30°F: Winter Territory
| Criteria | Score |
|----------|-------|
| Base Layer Need | 10/10 |
| Mid-Layer Need | 10/10 |
| Insulation Need | 9/10 |
| Technical Skill | 8/10 |
Once temperatures drop into the 20s, fall hiking transitions into winter conditions requiring specialized gear and knowledge. You'll need heavier base layers (250+ gsm merino), thicker mid-layers, insulated pants, and potentially softshell or hardshell pants for wind protection.
Ventilation becomes even more critical because the temperature difference between active hiking and rest stops increases. Many hikers make the mistake of bundling up too heavily, leading to excessive sweating that freezes when they stop moving.
For overnight trips in these temperatures, a cold-rated sleeping bag becomes essential. The Marmot Trestles Elite Eco 20°F Sleeping Bag handles these conditions with recycled synthetic fill that maintains warmth even if it gets damp—a real advantage in fall's unpredictable weather.
✅ What Works:
- Heavyweight base layers top and bottom
- Multiple mid-layers for adjustability
- Insulated puffy jacket for breaks
- Chemical hand warmers as backup heat
❌ What Fails:
- Single thick layer instead of multiple thin ones
- Inadequate head and hand protection
- Pushing through when you're getting cold—stop and add layers immediately
Key Layering Principles That Apply at Every Temperature
The "Slightly Cold" Starting Rule
You should feel slightly cool when you start hiking. If you're perfectly comfortable standing at the trailhead, you're overdressed for sustained uphill movement. Within 10-15 minutes of hiking with a loaded pack, your body temperature rises significantly.
Adjust Before You Need To
Don't wait until you're drenched in sweat to remove a layer, or shivering to add one. Open vents and zippers at the first sign of warmth, and add insulation the moment you stop for a break longer than a few minutes.
The Chest-Zip Test
If you can't comfortably hold your hand against your chest for 10 seconds while hiking, you're generating too much heat and need to ventilate or remove a layer. Your core temperature should feel warm but not hot.
Pack Accessibility Matters
Layers you'll adjust frequently should be easy to access. Keep your rain shell and mid-layer near the top of your pack or in external pockets. Wrestling with a buried jacket while standing on a windy ridgeline defeats the purpose of carrying it.
Fabric Choice Trumps Layer Count
One excellent moisture-wicking base layer outperforms three cotton t-shirts. Invest in proper fabrics rather than compensating with additional low-quality layers.
Managing Sweat and Moisture
Sweat management separates comfortable hikers from miserable ones in fall conditions. Even the best layering system fails if you're soaked from internal moisture rather than external precipitation.
Start with ventilation: Open zippers, roll up sleeves, and remove your hat before you start sweating heavily. It's easier to prevent moisture buildup than to dry out once you're damp.
Change your pace on steep climbs: Slowing down slightly reduces heat generation and sweat production. The time you lose by hiking 15% slower is negligible compared to the discomfort of hiking in soaked layers.
Use rest stops strategically: Add layers immediately when you stop moving, even if you feel warm from the climb. Your body temperature drops quickly once activity ceases, and damp base layers accelerate cooling.
Consider a spare base layer: For longer hikes or overnight trips, carrying a dry base layer to change into at camp weighs little but dramatically improves comfort and warmth.
Special Considerations for Different Hiking Styles
Day Hiking
Day hikers can take more risks with their layering system because they're never more than a few hours from the trailhead. If your system isn't working perfectly, you can adjust and learn for next time without serious consequences.
Focus on packability and weight savings. You don't need redundant layers—one good mid-layer and one shell cover most day-hiking scenarios between 30°F-60°F.
Backpacking
Overnight trips require more conservative layering choices and backup options. Carry an extra mid-layer or lightweight puffy even if you don't think you'll need it. The weight penalty is small compared to the misery of being cold at camp with no options.
Your sleeping system also factors in—if you have a warm sleeping bag like the Marmot Trestles Elite Eco, you can get away with lighter clothing layers. Budget options like the TETON Sports Celsius offer similar temperature ratings at $49.99 for hikers prioritizing gear cost over weight savings.
Trail Running and Fast Hiking
High-output activities require minimal layering even in cold conditions. A lightweight wind shell over a single base layer often suffices down to 40°F. The key is choosing pieces that pack small enough to carry when you're not wearing them.
Photography and Wildlife Watching
If you're spending extended periods stationary, layer for standing still rather than moving. You'll need more insulation than active hikers at the same temperature, and a packable puffy jacket becomes essential equipment rather than backup gear.
Frequently Asked Questions
How do I know if I'm wearing too many layers?
If you're sweating heavily within 15 minutes of starting your hike, or if you feel uncomfortably warm while moving at a steady pace, you're overdressed. You should feel slightly cool at the trailhead and comfortably warm (not hot) once you're hiking.
Should I buy expensive technical layers or will cheaper options work?
For base and mid-layers, fabric quality matters more than brand names. A $30 synthetic base layer from a reputable outdoor brand often performs nearly as well as a $100 merino option. For shells, spending more typically gets you better breathability and durability—the Patagonia Torrentshell at $179 genuinely outperforms $50 budget shells, but the Marmot Precip Eco at $109 offers excellent middle-ground value.
What's the biggest layering mistake fall hikers make?
Starting the hike too warm. Most people layer for standing still at the trailhead rather than for moving uphill with a pack. This leads to overheating, excessive sweating, and then getting cold when wet layers meet cool air at rest stops.
Do I really need a separate base layer or can I just wear a regular shirt?
For casual hikes under two hours in mild conditions, a regular athletic shirt works fine. For longer hikes or colder temperatures, proper base layers make a measurable difference in comfort. The moisture-wicking properties keep you drier, which keeps you warmer when you stop moving.
How do I layer for unpredictable fall weather?
Carry all three layers plus one backup insulation piece (lightweight puffy or vest). Start with fewer layers than you think you need, and add them progressively as conditions change. Weather prediction isn't perfect, but a packable layering system handles surprises better than starting with everything on.
Should I match my layering system to my hiking pace?
Absolutely. Fast hikers and trail runners need minimal layers even in cold conditions because they generate more heat. Slower-paced hikers, especially those carrying heavy packs, need more insulation because they generate less body heat per mile. For hikers dealing with foot pain that affects their pace, our guide to hiking boots for plantar fasciitis addresses comfort factors that influence hiking speed and layering needs.
Final Thoughts
Mastering fall layering comes down to three principles: start cooler than feels comfortable, adjust before you need to, and prioritize moisture management over maximum warmth. The three-layer system works because it's modular—you add and remove pieces based on activity level, temperature, and weather rather than committing to a single configuration for your entire hike.
The temperature ranges we've outlined provide starting points, but your personal thermoregulation, hiking pace, and pack weight all influence what works for you. Pay attention to when you overheat or get cold, and adjust your system accordingly on future hikes.
Invest in layers with good ventilation features and packability. A shell with pit-zips prevents more overheating episodes than any other single gear feature, and mid-layers that compress small make it easy to carry options without sacrificing pack space for water and snacks.
Start your next fall hike slightly underdressed, keep your layers accessible, and adjust frequently. You'll stay comfortable from trailhead to summit without the frustration of overheating on climbs or freezing at rest stops.
Editor's Choice
Patagonia Torrentshell 3L Rain Jacket — The pit-zips and packability make this our top pick for fall layering systems where ventilation control prevents overheating during climbs.
Marmot Precip Eco Rain Jacket — Best value for hikers who need waterproof-breathable protection without premium pricing, ideal for day hikers prioritizing packability.
Marmot Trestles Elite Eco 20°F Sleeping Bag — For backpackers extending into late fall, this 3-season bag handles cold overnight temperatures while your layering system manages daytime comfort.