Disclosure: As an Amazon Associate, HikePod earns from qualifying purchases at no extra cost to you.
⭐ Our Top Pick
🏆 Best Overall: Sawyer Squeeze Water Filter System — Filters to 0.1 micron, weighs just 3 oz, and carries a lifetime warranty, making it the most reliable way to get clean water after a leaky night in the tent.
💰 Best Value: LifeStraw Personal Water Filter — Removes 99.9999% of bacteria and parasites with no batteries needed, and it is a perennial Amazon #1 with over 124,000 reviews.
Introduction
You wake up at 2 a.m. to the unmistakable drip-drip-drip of water landing on your sleeping bag. Your tent, which kept you dry all last season, has suddenly turned into a sieve. Before you panic or start shopping for a new shelter, know this: most tent leaks are fixable at home with a few inexpensive supplies and a free afternoon.
We have researched tent care and repair for years, and the two most common culprits are failed seam tape and a worn-out polyurethane coating on the rainfly or floor. Both problems have well-established fixes — seam sealing and reproofing — that can add years of life to your tent. In this 2026 guide, we will walk you through each method step by step, explain which products actually work, and help you decide when a repair is worth it versus when it is time to upgrade.
We will also cover a critical but often overlooked detail: if your tent leaks, your water sources on the trail are probably muddy and silted too. That is why we have included our top picks for water filtration and purification, so you can stay hydrated safely even when the weather turns. If you are new to camping altogether, our First-Time Camping Guide: What to Expect on Your First Night Outdoors (2026) is a great place to start before you tackle gear repairs.
What to Look For
- Identify the leak source first. Before you buy anything, fill your bathtub or set up a sprinkler test. Leaks at seams point to failed seam tape, while misting or wet-through fabric indicates a worn DWR (durable water repellent) coating or degraded polyurethane.
- Match the sealant to your tent fabric. Silicone-based sealants like SilNet work best on silicone-treated nylon, while polyurethane sealants like Seam Grip are ideal for polyurethane-coated fabrics. Using the wrong one can cause peeling.
- Check the age and material of your tent. A 10-year-old tent with a sticky, peeling coating may not be worth repairing. Tents made from silnylon or silpoly generally respond better to reproofing than older PU-coated models.
- Consider the cost versus replacement. A $15 tube of seam sealant and a $20 bottle of spray-on DWR can extend your tent's life by several seasons. If repairs exceed 30% of a new tent's price, replacement may be smarter.
- Always test your repair before your trip. Set the tent up in the yard and hit it with a hose. A 24-hour cure time is standard for most sealants, so plan ahead.
- Do not forget your water strategy. A leaky tent often means rainy, muddy conditions. A reliable filter like the Sawyer Squeeze Water Filter System ensures you can drink safely from silty streams when clarity is poor.
Seam Sealing and Reproofing Deep-Dive
Seam Sealing: The First Line of Defense
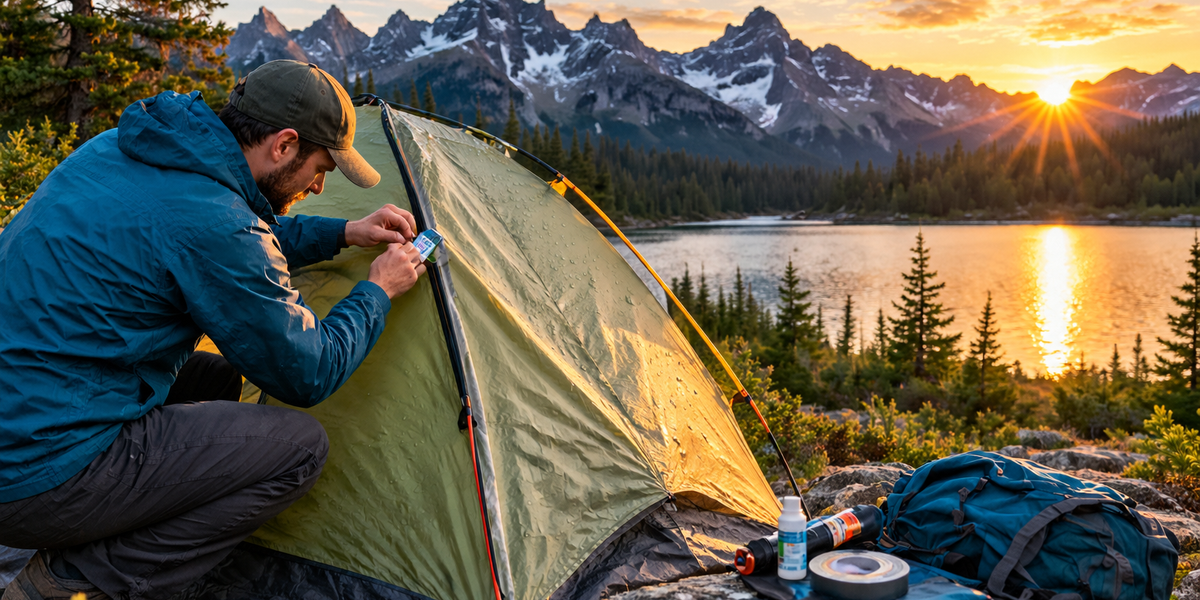
Seam sealing is the process of applying a flexible, waterproof sealant to the stitched seams of your tent, where needle holes and failed factory tape allow water to seep through. Most tents come with factory-taped seams, but that tape degrades over time — especially after repeated packing, UV exposure, and temperature swings.
How to seam seal your tent:
- Set up your tent in a well-ventilated area, ideally outdoors or in a garage. You need the seams taut and accessible.
- Clean the seams with isopropyl alcohol and a clean rag to remove dirt, old sealant, and oils. Let them dry completely.
- Apply seam sealant — we recommend a silicone-based option like Gear Aid SilNet for silnylon tents, or Seam Grip + SIL for a more durable bond. Use a small brush or the applicator tip to work the sealant into the stitching on the inside of the fly and floor.
- Allow 12–24 hours to cure. Do not touch the seams during this time. Humidity helps silicone cure, so a slightly damp day is actually fine.
- Test with a hose before your next trip. If water still beads through, apply a second thin coat.
💡 Pro Tip: For tents with taped seams that are peeling, you can often remove the old tape with a hair dryer on low heat, then seal the bare seams with liquid sealant. This is more reliable than trying to glue tape back down.
Reproofing: Restoring the DWR and PU Coating
Reproofing addresses the fabric itself. Over time, the durable water repellent (DWR) finish on your rainfly wears off, causing the fabric to "wet out" — it absorbs water instead of shedding it. If your tent fabric feels clammy or looks dark and saturated in the rain, it is time to reproof.
How to reproof your tent:
- Wash the tent with a tech wash like Nikwax Tech Wash. Never use regular detergent, which leaves residues that harm coatings.
- Apply a spray-on or wash-in DWR product. For tents, spray-on is generally better because it targets the exterior without affecting breathability. Hang the tent and spray evenly from 6–8 inches away.
- Heat-set the coating if the manufacturer recommends it. Some products benefit from a low tumble dry or a quick pass with a hair dryer on low. Always check the label.
- Re-seal seams after reproofing, since the washing process can loosen old sealant.
- Let everything cure for at least 24 hours before packing the tent away.
If your tent's polyurethane coating is sticky, flaking, or smells like vinegar, it has likely hydrolyzed — a chemical breakdown that is difficult to reverse. In that case, a new tent is usually the better investment. For campers who want to stay dry and comfortable, pairing a well-maintained tent with a reliable water filter is essential. The Katadyn BeFree 1.0L Water Filter Bottle offers a 2L/min flow rate and a squeezable soft flask that is perfect for fast-and-light hiking, while the Aquatabs 49mg Water Purification Tablets (30-Pack) weigh almost nothing and kill 99.9999% of bacteria and 99.99% of viruses as an ultralight backup.
Frequently Asked Questions
How often should I seam seal my tent?
Most manufacturers recommend checking seams annually and re-sealing every 2–3 years, or whenever you notice peeling tape or visible gaps. If you camp frequently in wet climates, inspect seams before every season.
Can I use silicone caulk instead of tent seam sealant?
No. Household silicone caulk is not flexible enough and will crack as the tent fabric moves. Always use a product specifically formulated for outdoor gear, such as SilNet or Seam Grip.
Will reproofing make my tent waterproof again?
Reproofing restores the water-repellent finish on the fabric, which helps it shed rain and resist wetting out. However, it does not repair structural damage or failed seams — you need to seam seal those separately.
How do I know if my tent is beyond repair?
If the fabric is sticky, flaking, or has a strong vinegar smell, the polyurethane coating has degraded beyond typical repair. Similarly, if the fabric tears easily or has large holes, replacement is usually more cost-effective.
What is the best way to dry a tent after a rainy trip?
Set it up in a shaded, well-ventilated area and let it air dry completely before packing. Never store a tent wet, as this promotes mildew and coating breakdown. If you must pack it damp, dry it within 24 hours.
Final Thoughts
A leaky tent is not the end of your camping career. With a tube of seam sealant, a bottle of DWR spray, and a free afternoon, you can restore your shelter's rain protection and save hundreds of dollars compared to buying new. The key is to identify whether the problem is seams, coating, or both — then treat each issue with the right product.
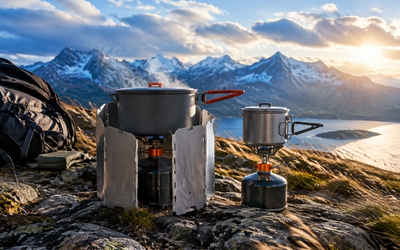
Once your tent is back in fighting shape, make sure your water game is just as reliable. A muddy, rain-swollen stream is no place to discover your filter is clogged. Whether you choose the Sawyer Squeeze Water Filter System for its lifetime warranty and 0.1-micron filtration, or the LifeStraw Personal Water Filter for its unbeatable price and 124,000+ reviews, you will be ready for whatever the backcountry throws at you. And if you are still dialing in your camp kitchen, our guide to the Best Camping Stoves for Windy Conditions 2026 can help you cook a hot meal even when the weather refuses to cooperate.
Editor's Choice
Sawyer Squeeze Water Filter System — The best overall choice for campers who want lightweight, reliable filtration with a lifetime warranty, perfect for silty post-rain water sources.
LifeStraw Personal Water Filter — An unbeatable value at $17.47, with no batteries or chemicals needed and over 124,000 reviews backing its performance.
Katadyn BeFree 1.0L Water Filter Bottle — Ideal for fast-and-light hikers who want a fast-flowing, all-in-one bottle filter that makes hydration effortless on the trail.