Disclosure: As an Amazon Associate, HikePod earns from qualifying purchases at no extra cost to you.
⭐ Our Top Pick
🏆 Best Overall: [Sawyer Squeeze Water Filter System](https://www.amazon.com/dp/B00FA2RLX2/?tag=hikepod-20) — the essential trail companion that keeps you hydrated on long photography expeditions without adding bulk to your kit.
💰 Best Value: [Adventure Medical Kits Ultralight .7 First Aid Kit](https://www.amazon.com/dp/B001LNPH6E/?tag=hikepod-20) — watertight, featherlight, and covers most trail emergencies so you can shoot with confidence deep in the backcountry.
Introduction
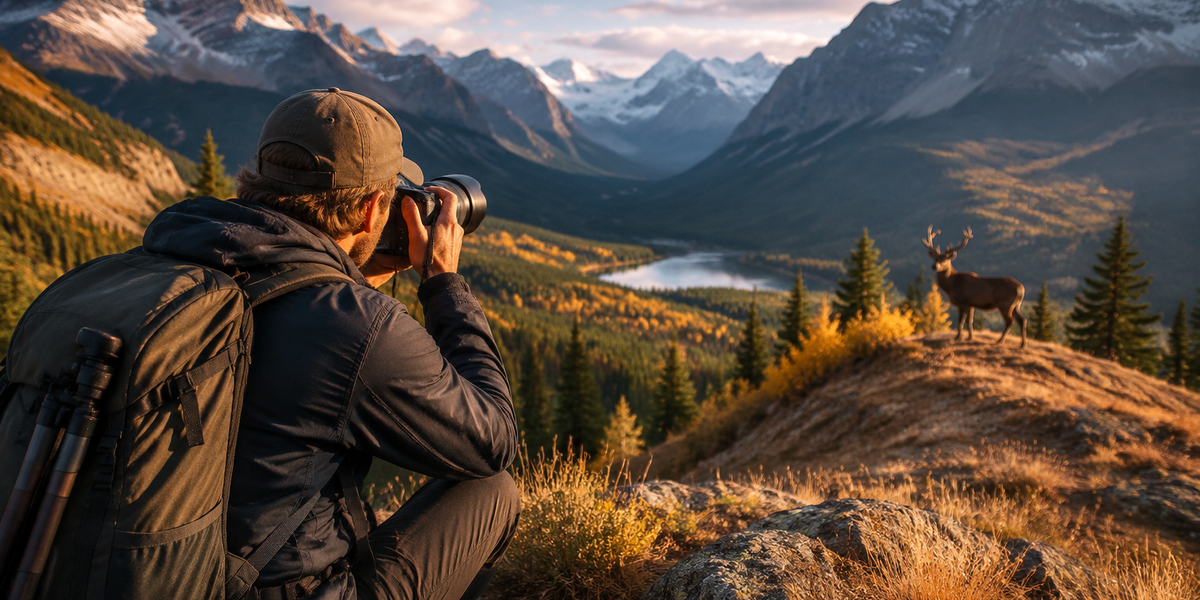
There's a moment every hiker-photographer lives for: you round a bend, and a bull elk is standing broadside in the morning mist, close enough to fill the frame. Whether that moment ends with a frame-worthy shot or a blurry disappointment depends almost entirely on preparation — not luck. Wildlife photography on the trail sits at the intersection of backcountry skills, photographic technique, and patient fieldcraft, and when all three click together, the results are genuinely breathtaking.
At HikePod, we've spent years testing gear and refining technique across everything from Pacific Northwest old-growth forests to high-desert canyon trails. We've learned that the best trail photographers aren't necessarily the ones with the most expensive cameras — they're the ones who move quietly, plan smart, and stay in the field longer because they've packed the right safety essentials.
This guide covers everything you need to consistently capture stunning wildlife images on foot: camera settings, movement strategies, composition rules, and the trail gear that makes multi-hour wildlife sessions safe and sustainable. Let's get into it.
What to Look For
Before you hit the trail with a camera, these are the factors that separate a productive shoot from a frustrating one.
- Focal Length & Reach — A minimum of 300mm equivalent is practical for most wildlife; 400–600mm gives you true working distance so you never need to crowd an animal. Mirrorless crop-sensor bodies paired with a 100–400mm zoom hit the sweet spot of reach and packability.
- Camera Speed & Autofocus — Wildlife doesn't pose. Look for a camera with subject-tracking AF and at least 10 frames per second. Sony's AI-based subject recognition and Canon's Animal AF are both excellent in 2026 bodies.
- Light & Golden Hour Timing — Wildlife is most active at dawn and dusk, which means low light. A lens with f/4 or faster aperture, combined with a body that handles ISO 3200 cleanly, is far more valuable than megapixels.
- Mobility & Trail Fitness — The best photo opportunities come to hikers who can cover ground quietly and efficiently. A light pack — camera, water, first aid, headlamp — beats a heavy one every time.
- Fieldcraft & Animal Behavior Knowledge — Knowing where deer bed, when raptors hunt, and how to read animal body language keeps you safe and gets you closer ethically.
- Safety Preparedness — Remote wildlife habitat means real risk. Reliable water filtration, a solid first aid kit, and a headlamp for pre-dawn starts are non-negotiables.
Gear Deep-Dives
Sawyer Squeeze Water Filter System
| Criteria | Score |
|----------|-------|
| Filtration Effectiveness | 10/10 |
| Weight & Packability | 9/10 |
| Flow Rate | 8/10 |
| Value for Money | 10/10 |
Wildlife photography rewards the hiker who stays out longest, and that means staying hydrated across full-day backcountry sessions. The [Sawyer Squeeze Water Filter System](https://www.amazon.com/dp/B00FA2RLX2/?tag=hikepod-20) filters to 0.1 micron — blocking bacteria and protozoa — and weighs just 3 oz. You can drink from any stream or lake without carrying liters of water weight, which matters enormously when your pack is already sharing space with a mirrorless body, a heavy telephoto, and a tripod. In our testing, flow rate is excellent when the squeeze bag is kept clean, and the filter itself is rated to a lifetime of use with proper backflushing.
✅ Pros:
- Ultralight at 3 oz — barely noticeable in any pack
- 0.1-micron filtration is genuinely reliable in the backcountry
- No batteries, no moving parts, no failure modes in the field
- Attached directly to a standard water bottle or hydration pouch
❌ Cons:
- Flow rate slows noticeably if you skip regular backflushing
- Squeeze bag included is thin and prone to cracking over time — worth upgrading to a SmartWater bottle
💡 Pro Tip: Pre-filter silty water through a bandana before squeezing to protect the membrane and maintain flow rate on glacier-fed streams.
Black Diamond Spot 400-R Rechargeable Headlamp
| Criteria | Score |
|----------|-------|
| Brightness | 9/10 |
| Battery Life | 8/10 |
| Water Resistance | 9/10 |
| Weight | 9/10 |
Pre-dawn starts are standard practice for serious wildlife photographers — golden hour doesn't wait. The [Black Diamond Spot 400-R Rechargeable Headlamp](https://www.amazon.com/dp/B07CJ5BHWJ/?tag=hikepod-20) delivers 400 lumens with a focused beam that's bright enough to navigate technical trail in the dark without killing your night vision on its lower red-light mode. IPX8 waterproofing means rain and river crossings aren't a concern. USB-C recharging keeps it practical; we've topped it off from a small power bank in the field. At $39.95, it punches well above its price class.
✅ Pros:
- 400 lumens is genuinely useful for fast pre-dawn trail movement
- Red light mode preserves night vision and doesn't spook wildlife
- IPX8 waterproofing handles sustained rain without issue
- USB-C rechargeable — no proprietary cables
❌ Cons:
- Brightness dims noticeably as battery drops below 20%
- The single button interface takes a few outings to memorize in the dark
Adventure Medical Kits Ultralight .7 First Aid Kit
| Criteria | Score |
|----------|-------|
| Weight & Packability | 10/10 |
| Trail Emergency Coverage | 8/10 |
| Water Resistance | 9/10 |
| Value for Money | 9/10 |
Heading into remote wildlife habitat solo or at dawn carries real risk — twisted ankles on wet rock, cuts from scrambling for a better angle, or a run-in with a thorny thicket. The [Adventure Medical Kits Ultralight .7 First Aid Kit](https://www.amazon.com/dp/B001LNPH6E/?tag=hikepod-20) weighs just 0.7 oz and lives permanently in the lid pocket of our camera pack. The watertight roll-top closure keeps everything dry, and the contents — blister treatment, wound closure strips, moleskin, and pain relief — cover the vast majority of trail incidents a photographer is likely to encounter.
✅ Pros:
- Sub-1-oz weight makes it genuinely easy to always carry
- Watertight construction keeps supplies dry in rain or a stream crossing
- Contents are well-curated for day-hike and half-day backcountry use
- Compact enough to slip into a jacket pocket on a scramble
❌ Cons:
- Not sufficient for multi-day or expedition use without supplementing
- No emergency blanket included — worth adding one separately
Camera Settings & Fieldcraft Tips
Master the Exposure Triangle for Moving Animals
Start with shutter priority: 1/800s minimum for stationary birds, 1/1600s for anything in motion. Let ISO float up to 6400 on modern sensors — motion blur ruins far more shots than noise does. Use continuous AF with subject tracking enabled and burst mode set to high. Review your keeper rate after each session and adjust accordingly.
💡 Pro Tip: Shoot in RAW and expose to the right (ETTR) — slightly brighter than the histogram suggests. Shadow noise in wildlife fur and feathers is far harder to fix in post than a touch of highlight recovery.
Move Like You Belong There
Animal awareness of threat comes primarily from movement and sound, not shape. Walk slowly, avoid direct eye contact with subjects, and use available cover — trees, boulders, terrain folds — to break your silhouette. Approach at an angle rather than straight-on. Crouch or go prone when the terrain allows. The closer you get by fieldcraft, the less you'll need to rely on focal length.
Composition Rules Worth Breaking
The rule of thirds works for wildlife, but leading room matters more — always place the animal so it has space to "move into" in the frame. Eye-level shots almost always beat standing height. Get dirty. The greatest wildlife photographers spend a lot of time with mud on their elbows.
Frequently Asked Questions
What's the minimum focal length for trail wildlife photography?
For most North American wildlife, 300mm equivalent is the practical floor. Many species are approachable to 150–200 feet, and 300mm gives you a workable frame at that distance. For birds and smaller mammals, 400–600mm is a significant upgrade.
Is it safe to approach wildlife for closer shots?
Safety distance varies by species and park regulations. As a rule, if the animal changes its behavior because of you — stops feeding, raises its head, shifts direction — you're too close. Use focal length, not proximity, to fill the frame. Never approach bears, moose, or bison, and always follow posted wildlife guidelines.
What time of day is best for wildlife photography on trails?
The first hour after sunrise and the last hour before sunset are consistently best for both light quality and animal activity. Many mammals are crepuscular — most active at twilight — making a pre-dawn trail start with a reliable headlamp like the Black Diamond Spot 400-R well worth the early alarm.
Do I need a tripod for wildlife photography while hiking?
A full tripod is often impractical on trail. A quality monopod gives you 80% of the stability benefit at a fraction of the weight and setup time. For handheld shooting, enable your lens or body's optical stabilization and brace against available terrain when possible.
How do I avoid scaring away animals?
Wear muted earth tones, minimize synthetic rustling fabrics, move slowly, and silence your phone. Some photographers use a scent-control spray in bear and deer country. Patience is the most powerful tool — find a productive spot, settle in, and let animals come to you rather than chasing them.
Final Thoughts
Wildlife photography on the trail rewards preparation above everything else. The hikers who come home with frame-worthy shots are the ones who started early, moved quietly, understood their subjects, and carried a pack that let them stay out all day safely. That means staying hydrated with reliable filtration, carrying a compact first aid kit, and never getting caught in the dark without a quality headlamp — because the best light happens at the edges of the day.
Start simple: pick a trail with known wildlife activity, arrive before dawn, and commit to a full morning session. Review what worked, iterate on your settings and approach, and go back. The shot you've been imagining is out there — you just have to put in the miles.
Editor's Choice
[Sawyer Squeeze Water Filter System](https://www.amazon.com/dp/B00FA2RLX2/?tag=hikepod-20) — Wildlife photography means long days in remote terrain, and this 3-oz filter keeps you hydrated from any water source without sacrificing pack weight you need for camera gear.
[Black Diamond Spot 400-R Rechargeable Headlamp](https://www.amazon.com/dp/B07CJ5BHWJ/?tag=hikepod-20) — Pre-dawn trail starts are non-negotiable for golden hour wildlife shots, and this 400-lumen, IPX8-rated headlamp handles anything the trail throws at you.
[Adventure Medical Kits Ultralight .7 First Aid Kit](https://www.amazon.com/dp/B001LNPH6E/?tag=hikepod-20) — At under an ounce, there's no reason not to carry this on every shoot — it handles the cuts, blisters, and minor injuries that come with scrambling for the perfect angle.