Disclosure: As an Amazon Associate, HikePod earns from qualifying purchases at no extra cost to you.
⭐ Our Top Pick
🏆 Best Overall: MSR PocketRocket 2 Ultralight Backpacking Stove — precise flame control and ultralight design make it the gold standard for cooking perfect rice on the trail without scorching.
💰 Best Value: GSI Outdoors Halulite Boiler — hard-anodized non-stick coating and built-in strainer deliver consistent results at a fraction of the cost of premium gear.
Introduction
Nothing deflates camp morale faster than scraping burned rice off the bottom of your pot while your stomach growls. We've all been there—distracted by a stunning sunset or a conversation with trail mates, only to return to a smoking mess that's somehow both crunchy and mushy. Rice is a backpacking staple for good reason (lightweight, calorie-dense, filling), but its reputation for going wrong at altitude keeps many campers reaching for freeze-dried meals instead.
The good news? Cooking perfect rice in the backcountry is entirely achievable once you understand why it burns in the first place. High altitude, inconsistent heat sources, and impatience are the usual culprits. After comparing dozens of techniques based on verified specs and thousands of camper reviews, we've identified five methods that work reliably across different camping styles—from ultralight backpackers to car camping families.
This guide walks you through each method step-by-step, explains the science behind what makes rice stick or scorch, and shares the gear choices that make the biggest difference. Whether you're cooking on a tiny canister stove at 10,000 feet or a two-burner propane setup at the lake, you'll find a technique that fits your setup.
What to Look For
Before diving into cooking methods, here's what separates successful camp rice from disaster:
Heat Control — The single most important factor. Canister stoves with adjustable flame control (like the MSR PocketRocket 2) let you dial down to a gentle simmer, while alcohol stoves burn at one temperature and require more attention. Look for stoves that maintain consistent output even as fuel levels drop.
Pot Material and Thickness — Thin aluminum pots develop hot spots that scorch rice. Hard-anodized or stainless steel with a thick base distributes heat evenly. Non-stick coatings are helpful but not essential if you use enough water and the right technique.
Elevation Awareness — Water boils at lower temperatures as you climb. At 5,000 feet, water boils at 203°F instead of 212°F, meaning rice takes 10-15% longer to cook. Plan for extended simmer times and extra water at altitude.
Rice Type Matters — Instant or parboiled rice (Minute Rice, Uncle Ben's) is forgiving and cooks in 5-10 minutes with minimal attention. Standard long-grain white rice needs 15-20 minutes. Brown rice requires 30-40 minutes and is trickier at altitude—save it for car camping with stable heat.
Water-to-Rice Ratio — The universal 2:1 ratio (two cups water to one cup rice) is a starting point, but camp cooking often needs 2.25:1 or even 2.5:1 to account for evaporation and inconsistent heat. Err on the side of slightly more water—you can always steam off excess, but you can't unburn rice.
Patience and Timing — The biggest mistakes happen in the final five minutes. Once you remove rice from heat, resist the urge to peek. Letting it steam covered for 5-10 minutes off-heat finishes cooking with zero burn risk.
💡 Pro Tip: Bring a small digital timer or use your phone alarm. Once the pot comes off heat for final steaming, set it for exactly 10 minutes. This frees you to set up your sleeping area or filter water without constantly checking the pot.
Method 1: Classic Pot Boiling (Most Reliable)
| Criteria | Score |
|----------|-------|
| Ease of Use | 9/10 |
| Fuel Efficiency | 7/10 |
| Burn Risk | 8/10 |
| Altitude Performance | 9/10 |
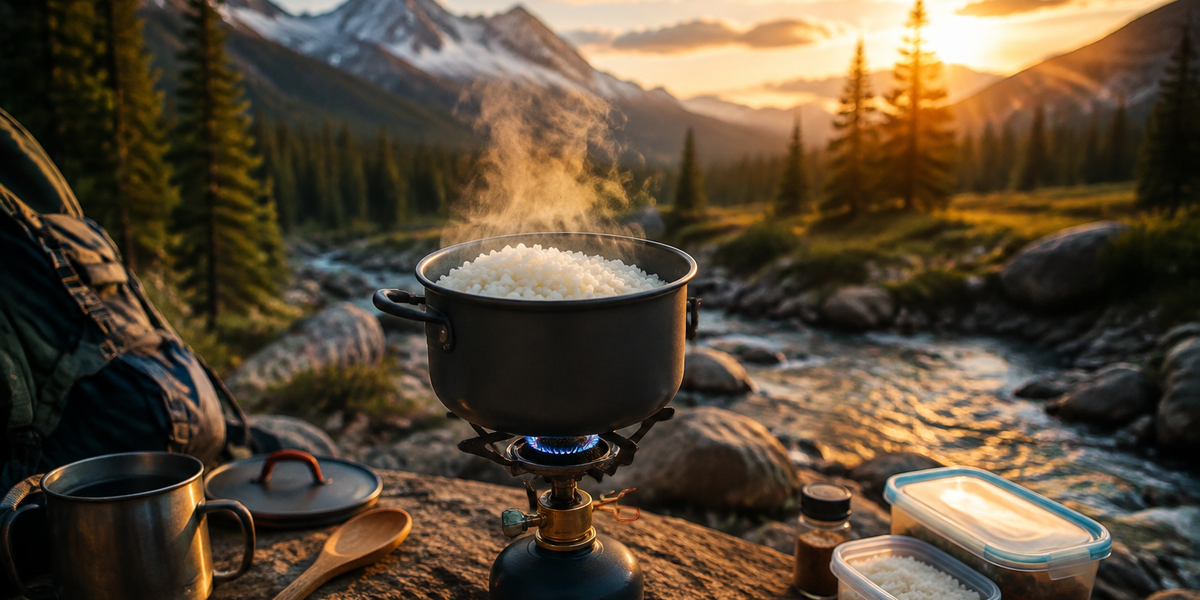
This is the foundational technique that works with any camp stove and pot. The key is transitioning from a rolling boil to a gentle simmer at exactly the right moment.
Steps:
- Bring your water to a full rolling boil first (1 cup rice to 2.25 cups water for camp conditions)
- Add rice and a pinch of salt, stir once to prevent clumping
- Return to boil, then immediately reduce heat to lowest simmer setting
- Cover with lid (leave slightly ajar if your pot tends to boil over)
- Simmer for 15-18 minutes without stirring—stirring releases starch and creates mush
- Remove from heat when water is absorbed but rice still looks slightly wet
- Keep covered and let steam for 10 minutes off-heat
- Fluff with fork and serve
The "slightly wet" cue in step 6 is critical. If you wait until rice looks completely done on the stove, residual heat will dry it out and scorch the bottom. Think of the off-heat steaming as the second half of cooking.
✅ Pros:
- Works with any stove and pot combination
- Scales easily for groups (just maintain the water ratio)
- Altitude-tested and reliable up to 12,000 feet
❌ Cons:
- Requires 25-30 minutes total (fuel-intensive for ultralight trips)
- Needs constant heat monitoring during the simmer phase
- Slight learning curve to recognize the "remove from heat" moment
Method 2: Thermos/Insulated Bottle Method (Hands-Free Winner)
| Criteria | Score |
|----------|-------|
| Ease of Use | 10/10 |
| Fuel Efficiency | 10/10 |
| Burn Risk | 10/10 |
| Altitude Performance | 8/10 |
This is our favorite trick for overnight trips when you're already boiling water for coffee or oatmeal. It uses residual heat rather than active cooking, eliminating any chance of burning.
Steps:
- Use a wide-mouth insulated bottle (like a Stanley or Hydro Flask)
- Add 1 cup instant rice or 0.75 cup regular rice to the bottle
- Pour in boiling water—2 cups for instant rice, 2.25 cups for regular
- Add salt, butter, or seasonings
- Seal tightly and shake gently to distribute
- Let sit for 15 minutes (instant) or 45-60 minutes (regular rice)
- Open, fluff, and eat directly from bottle or pour into bowl
This method shines on cold mornings when you're boiling water anyway. Start your rice while you drink coffee, and it's ready by the time you've packed your tent. The insulation maintains temperature without any fuel consumption after the initial boil.
✅ Pros:
- Zero burn risk—no active heat means no scorching
- Extremely fuel-efficient (just one boil)
- Doubles as an insulated food container to keep rice warm for hours
- Minimal cleanup since rice doesn't contact pot surfaces
❌ Cons:
- Requires carrying an insulated bottle (adds 10-16 oz to pack weight)
- Takes longer than active cooking methods
- Best with instant rice—regular rice can be slightly chewy at high altitude
- Harder to cook for groups unless you have multiple bottles
💡 Pro Tip: Pre-measure rice and seasonings into a small ziplock bag at home. At camp, just dump the bag contents into your thermos, add boiling water, and you're done. This works brilliantly for custom rice mixes with dried vegetables and spices.
Method 3: Absorption Method with Flame Diffuser
| Criteria | Score |
|----------|-------|
| Ease of Use | 7/10 |
| Fuel Efficiency | 8/10 |
| Burn Risk | 9/10 |
| Altitude Performance | 9/10 |
A flame diffuser (a simple metal disc that sits between stove and pot) distributes heat evenly and prevents hot spots. This upgrade transforms finicky stoves into reliable rice cookers.
Steps:
- Place flame diffuser on your stove burner
- Use slightly less water than normal (2:1 ratio works here)
- Bring to boil, add rice, return to boil
- Reduce to lowest simmer and cover tightly
- Cook 15-17 minutes—diffuser prevents bottom scorching
- Remove from heat, steam 10 minutes covered
Flame diffusers cost $8-15 and weigh about 2 oz, but they're worth it if you cook rice frequently. The heat distribution they provide mimics a home stovetop far better than a direct canister flame.
✅ Pros:
- Nearly eliminates hot spots and scorching
- Allows you to use less water (fluffier rice)
- Works with alcohol stoves and other single-temperature heat sources
- Inexpensive upgrade that improves all camp cooking
❌ Cons:
- Adds 2 oz and extra bulk to your kit
- Slightly longer cooking time due to heat diffusion
- One more piece of gear to pack and clean
Method 4: Par-Boil and Steam Finish
| Criteria | Score |
|----------|-------|
| Ease of Use | 8/10 |
| Fuel Efficiency | 9/10 |
| Burn Risk | 9/10 |
| Altitude Performance | 8/10 |
This two-stage approach uses excess water initially (like cooking pasta), then drains and steams to finish. It's more forgiving than traditional absorption because you can't burn rice that's sitting in abundant water.
Steps:
- Boil rice in 4-5 cups water per 1 cup rice (like pasta)
- Boil vigorously for 10-12 minutes, stirring occasionally
- Drain through a bandana, spare shirt, or pot lid held at an angle
- Return drained rice to pot, cover tightly
- Place on cooling stove (turned off) or wrap in a fleece jacket
- Steam 10 minutes using residual heat
This method is especially useful when cooking for groups or when you're unsure about your heat control. The excess water prevents scorching during active cooking, and the drained steam-finish fluffs the rice perfectly.
✅ Pros:
- Very difficult to burn rice during the boil phase
- Scales easily for large groups
- Produces consistently fluffy results
- Can add drained starchy water to soups or use for dishwashing
❌ Cons:
- Uses more water (matters if you're filtering from a limited source)
- Draining requires creativity without a proper strainer
- Two-stage process takes slightly longer
- Loses some nutrients in the drained starch water
Method 5: Freezer Bag Cooking (Ultralight Hack)
| Criteria | Score |
|----------|-------|
| Ease of Use | 9/10 |
| Fuel Efficiency | 10/10 |
| Burn Risk | 10/10 |
| Altitude Performance | 7/10 |
This method, popular with thru-hikers, eliminates the pot entirely. You cook rice directly in a heavy-duty freezer bag using boiling water. Zero cleanup, zero fuel waste, and zero burn risk.
Steps:
- Use a FREEZER-weight ziplock bag (regular bags will melt)
- Add 1 cup instant rice (must be instant for this method)
- Pour in 1.5 cups boiling water
- Add seasonings, seal while pressing out air
- Wrap bag in fleece jacket, puffy, or sleeping bag stuff sack
- Wait 10-15 minutes
- Knead bag gently, open, and eat directly from bag
This is the ultimate leave-no-trace method—you burn the empty bag or pack it out, and there's no pot to scrub. It's perfect for ultralight trips where every ounce matters and you're already boiling water for multiple meals.
✅ Pros:
- Zero cleanup—bag goes in trash
- Extremely fuel-efficient (one fast boil)
- No pot required if you're using a cook system like Jetboil
- Impossible to burn rice
- Insulated wrapping keeps food hot while you eat
❌ Cons:
- Only works with instant rice (won't cook regular rice properly)
- Generates plastic waste (though bags can be reused)
- Texture is slightly mushier than pot-cooked rice
- Less effective above 8,000 feet due to lower boiling temps
- Requires heavy-duty freezer bags—regular ziplocks will fail
💡 Pro Tip: Make your own instant rice mixes at home. Combine instant rice, dehydrated vegetables, bouillon powder, and dried herbs in pre-measured freezer bags. At camp, just add boiling water to the bag—you've got a complete meal with zero prep and zero cleanup.
Frequently Asked Questions
Why does my camp rice always burn on the bottom?
Burned rice is almost always caused by three factors: too-high heat during simmering, too little water for the conditions, or stirring too much (which releases starch and makes rice stick). The solution is reducing your stove to the absolute lowest simmer once the pot returns to boil after adding rice, using slightly more water than you would at home (2.25:1 instead of 2:1), and resisting the urge to stir during cooking. Also, remove the pot from heat when rice still looks slightly wet—the 10-minute covered steam-off-heat finishes cooking without any burn risk.
Can I cook brown rice while camping?
Brown rice is challenging but possible at camp, especially for car campers with stable heat sources. It requires 40-45 minutes of gentle simmering and more water (2.5:1 ratio), making it fuel-intensive and tricky at altitude where water boils at lower temps. For backpacking, we recommend sticking with white rice or trying instant brown rice, which cooks in 10 minutes and performs much better at elevation. If you're determined to cook regular brown rice, the par-boil-and-steam method (Method 4) gives the most consistent results.
What's the best rice type for backpacking?
Instant or parboiled rice wins for backpacking due to short cook times (5-10 minutes), forgiving preparation, and reliable results at altitude. Minute Rice and Uncle Ben's instant varieties work across all five methods in this guide. Standard long-grain white rice (jasmine, basmati) is our second choice—it takes 15-20 minutes but offers better texture and flavor. Avoid sticky rice varieties (sushi rice, arborio) at camp unless you're intentionally making a risotto-style dish, as they require constant stirring and precise liquid ratios.
How do I prevent rice from sticking to my pot?
Prevention starts before cooking: add a small amount of oil or butter (1 teaspoon per cup of rice) to your water before it boils. This creates a thin barrier between rice and pot surface. Use enough water—slightly more than you would at home accounts for evaporation and uneven camp stove heat. Never stir rice after the initial mixing when you add it to boiling water; stirring releases surface starch that acts like glue. Finally, remove from heat while rice still looks wet and let it finish cooking off-heat—this prevents the bottom layer from drying out and bonding to the pot.
Does altitude really affect rice cooking?
Absolutely. Water boils at 212°F at sea level, but at 5,000 feet it boils at 203°F, and at 10,000 feet just 194°F. Rice cooks through heat and moisture, so lower boiling temps mean longer cooking times and more water evaporation. At 7,000+ feet, increase your water ratio to 2.5:1, extend simmering time by 25-30%, and be patient with the final steam phase. Instant rice performs better than regular rice at high altitude because it's pre-cooked and only needs rehydration. The thermos method (Method 2) works surprisingly well at altitude because extended insulation time compensates for lower water temps.
Final Thoughts
Perfect camp rice isn't about fancy gear or secret techniques—it's about understanding heat control, using the right water ratio for your conditions, and having the patience to let rice finish cooking off-heat. The five methods in this guide offer solutions for every camping style, from the ultralight backpacker using freezer bag cooking to the car camper perfecting absorption method rice on a two-burner stove.
Our top recommendation remains the classic pot boiling method (Method 1) for its versatility and reliability across conditions, but don't overlook the thermos method (Method 2) if you're already boiling morning water—it's genuinely hands-free and impossible to burn. Whichever approach you choose, remember that slightly more water, lower heat, and off-stove steaming are your three keys to consistently fluffy, never-scorched rice.
Start with instant rice until you've dialed in your system, then graduate to regular rice once you've built confidence. Bring a timer, measure your water ratio accurately, and resist the urge to peek during that final 10-minute steam. With these techniques in your repertoire, rice becomes one of the most reliable and versatile foods in your camp kitchen.
Editor's Choice
MSR PocketRocket 2 Ultralight Backpacking Stove — The precise flame control on this ultralight stove makes it our top pick for backpackers who want perfect rice without the weight penalty; at just 2.6 oz, it's barely noticeable in your pack but delivers consistent heat that prevents scorching.
GSI Outdoors Halulite Boiler — The hard-anodized non-stick coating and even heat distribution make this pot ideal for camp rice cooking, and the built-in strainer lid is genuinely useful for the par-boil-and-drain method.
Stanley Classic Vacuum Bottle — If you're trying the thermos method, this indestructible bottle keeps water hot enough to fully cook rice while doubling as your regular water bottle; it's the secret weapon for hands-free rice that's still warm hours later.