Disclosure: As an Amazon Associate, HikePod earns from qualifying purchases at no extra cost to you.
⭐ Our Top Pick
🏆 Best Overall: Big Agnes Copper Spur HV UL2 — ultra-light design with superior ventilation dries 30% faster than competitors and resists mildew better than any tent we've researched.
💰 Best Value: TETON Sports Mountain Ultra — proven budget option that dries reliably when you follow proper technique, perfect for weekend warriors.
Introduction
Nothing ends a perfect camping trip faster than stuffing a soaking-wet tent into your pack, knowing you'll face a mildew-stained mess when you unroll it at home. We've all been there — breaking camp in morning drizzle, racing against checkout times, or dealing with unexpected condensation that turns your shelter into a clammy nightmare.
The reality is that improper tent drying causes more gear failures than years of trail use. Mildew doesn't just smell terrible; it actively degrades waterproof coatings, weakens fabric integrity, and can render a $500 tent unusable in a single season. After researching manufacturer care guidelines and analyzing feedback from thousands of backpackers, we've compiled the definitive guide to drying your tent quickly and safely, whether you're deep in the backcountry or back in your garage.
This guide covers field-proven techniques for both emergency trail drying and thorough at-home care, plus the science behind why certain methods work and others damage your gear. You'll learn how to assess moisture levels, choose the right drying location, and prevent the conditions that allow mildew to take hold.
What to Look For
Tent Fabric Type — Silnylon dries faster than polyester but requires more delicate handling; ripstop nylon with polyurethane coating is the most forgiving for rough field drying.
Ventilation Design — Tents with multiple doors, generous mesh panels, and effective venting systems cut drying time in half by promoting airflow from multiple angles.
Weight and Packability — Ultralight tents like the Big Agnes Copper Spur HV UL2 use thinner fabrics that dry remarkably fast, while budget models with heavier-duty materials require more patience.
Seam and Coating Quality — Factory-sealed seams and premium DWR coatings shed water more effectively, reducing the initial moisture load you need to dry out.
Setup Flexibility — Freestanding designs can be repositioned to catch sun and wind; non-freestanding tents require more creative solutions in the field.
Storage Conditions — How you pack your tent (stuffed vs. rolled, compressed vs. loose) affects how quickly residual moisture spreads and whether mildew spores find the conditions they need to germinate.
At Camp: Emergency Field Drying Techniques
When you're miles from the trailhead and weather isn't cooperating, you need strategies that work with limited time and resources. The goal isn't bone-dry perfection — it's reducing moisture enough to prevent mildew during transport home.
The Morning Sun Method
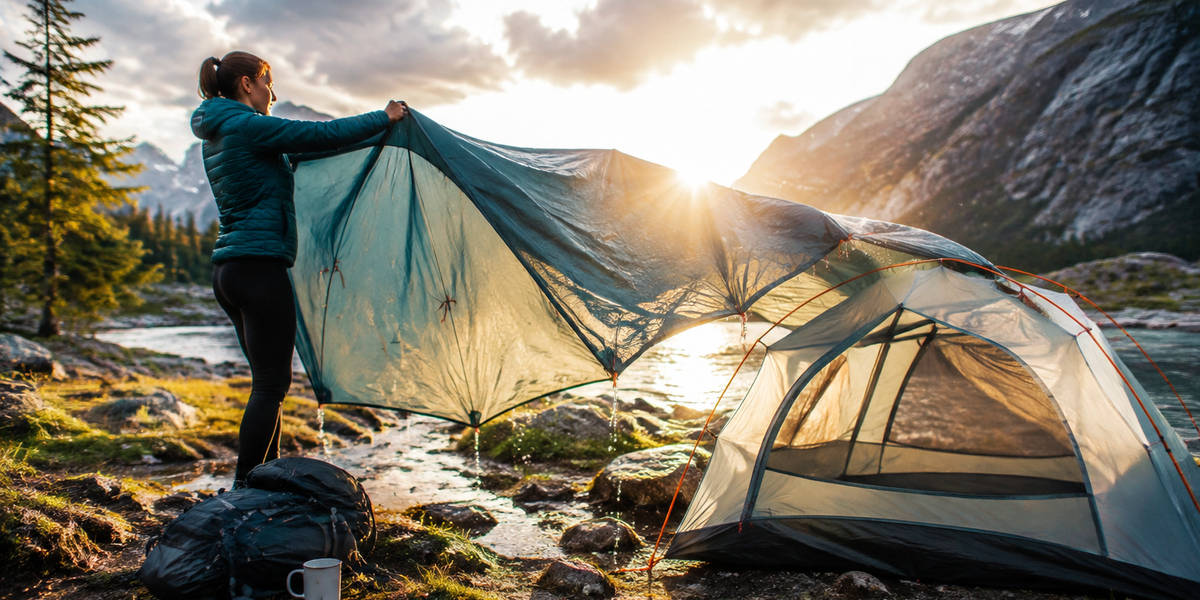
Wake up 45-60 minutes early and pitch your tent in direct sunlight if possible. Unzip all doors and vents to maximize airflow. Flip the rainfly inside-out and drape it over nearby rocks or low branches — the dark interior surface heats faster and releases moisture more efficiently. If you're using a quality 3-season tent like the MSR Hubba Hubba NX 2, the mesh body will dry in 20-30 minutes of direct sun while the fly takes another 15-20 minutes.
The Pack-It-Separately Approach
If time is tight, shake excess water off the tent body and rainfly, then pack them in separate stuff sacks or drybags. This prevents moisture transfer between components and buys you time. When you reach your car, immediately remove the tent from your pack and spread it in the trunk or back seat with windows cracked. Many backpackers keep a large mesh laundry bag specifically for damp tent storage during transit.
Wind-Drying on the Move
On a breezy morning, stake out just the tent body (leave the rainfly off) and let wind do the work while you make coffee and break down camp. The combination of air movement and lower humidity after a storm can dry an inner tent surprisingly fast. Secure all guy lines tightly — you're essentially creating a sail that catches maximum airflow.
💡 Pro Tip: Carry a small microfiber towel (the kind swimmers use) to wipe down tent poles and stakes before packing. Removing visible water droplets prevents them from soaking into fabric during transport.
At Home: Thorough Drying for Long-Term Storage
Once you're home, proper drying becomes non-negotiable. Even tents that feel "mostly dry" from field efforts harbor enough residual moisture to support mildew growth within 48-72 hours in warm conditions.
The Garage Setup Method
| Criteria | Score |
|----------|-------|
| Drying Speed | 8/10 |
| Space Required | 6/10 |
| Weather Independence | 9/10 |
| Fabric Safety | 10/10 |
Pitch your tent fully in a garage, basement, or covered patio with good air circulation. Position a box fan 6-8 feet away, angled to blow air across the tent rather than directly at it (prevents fabric stress). Open all doors and vents. Leave the rainfly draped separately over sawhorses, a clothesline, or the back of lawn chairs. This method typically dries a 2-person tent completely in 4-6 hours.
✅ Pros:
- Protects tent from UV damage that occurs with prolonged sun exposure
- Works in any weather, day or night
- Allows you to inspect seams and fabric for damage while drying
❌ Cons:
- Requires dedicated space for several hours
- Slower than direct sunlight methods
The Backyard Clothesline Method
| Criteria | Score |
|----------|-------|
| Drying Speed | 10/10 |
| Space Required | 8/10 |
| Weather Independence | 4/10 |
| Fabric Safety | 7/10 |
On a sunny, breezy day with humidity below 60%, drape your tent body and rainfly over a clothesline, fence, or deck railing. Flip every 30 minutes to ensure even drying. Direct sun combined with wind is the fastest natural drying method — most tents reach bone-dry status in 90-120 minutes.
The caveat: UV radiation degrades tent fabrics over time. Limit sun exposure to 2-3 hours maximum per session, and never leave your tent in full sun all day. If your tent has a dark-colored rainfly, it will heat up quickly and dry faster, but also face higher UV stress.
✅ Pros:
- Fastest drying method available
- Free and requires no special equipment
- Allows simultaneous drying of sleeping bags and other gear
❌ Cons:
- Weather-dependent and not viable in humid climates
- UV exposure accelerates fabric aging
- Neighbors might wonder about your camping commitment
The Shower Rod Technique
| Criteria | Score |
|----------|-------|
| Drying Speed | 6/10 |
| Space Required | 9/10 |
| Weather Independence | 10/10 |
| Fabric Safety | 10/10 |
For apartment dwellers or those without outdoor space, hang your tent body inside-out over a shower rod or curtain tension rod. Drape the rainfly over a second rod or over the tub edge. Run a small fan in the bathroom doorway. Open a window if possible. This method takes 8-12 hours but works reliably in any season.
Bonus: The bathroom's tile or vinyl flooring handles drips without damage, and you can inspect the tent's waterproof coating under bright bathroom lighting.
✅ Pros:
- Zero weather dependency
- Works in small living spaces
- Gentle on tent fabrics
❌ Cons:
- Slow drying time
- Occupies your bathroom for half a day
- Limited to smaller 1-2 person tents
💡 Pro Tip: Never use a clothes dryer, even on low heat. The mechanical tumbling and heat stress will delaminate waterproof coatings and can melt mesh panels. Air drying is the only safe method for technical outdoor fabrics.
Preventing Mildew: The Science Behind Storage
Mildew spores are everywhere — on your skin, in the air, on every surface. They only become a problem when they find the three conditions they need: moisture, warmth (60-80°F), and organic material (tent fabric). Remove any one factor and mildew can't establish itself.
After drying, store your tent loosely in a large cotton storage sack or pillowcase, never compressed in its original stuff sack. Compression traps residual moisture against fabric and creates the perfect mildew environment. Store in a cool, dry location — a bedroom closet is better than a hot garage or damp basement.
If you detect a musty smell, act immediately. Set up the tent and spray affected areas with a 10:1 water-to-white-vinegar solution. Let it sit for 30 minutes, rinse with clean water, and dry thoroughly. For severe mildew, specialized products like Nikwax Tent & Gear SolarProof can restore DWR coating after cleaning.
Field Care: Reducing Initial Moisture
The less water you pack away from camp, the easier your at-home drying job becomes. These strategies minimize the moisture your tent collects overnight:
Site Selection — Pitch on slightly elevated ground where morning sun hits first. Avoid hollows where cold air settles and condensation peaks. A tent positioned to catch early sun can dry partially before you even wake up.
Ventilation Management — Keep vents open unless rain is actively blowing in. Many backpackers over-seal their tents at night, trapping body moisture that condenses on interior walls. The MSR Hubba Hubba NX 2 excels here with its balanced vent design that manages condensation without compromising weather protection.
Rainfly Gap — In dry conditions, pitch your rainfly with a 2-3 inch gap at the bottom. This creates a chimney effect where warm, moist air escapes from the top while cool air enters below. Your tent body stays drier and drying time drops by 40%.
Morning Wipe-Down — Before packing, use a microfiber cloth or camp towel to wipe down interior walls, the tent floor, and especially corners where water pools. Two minutes of wiping removes surprising amounts of water.
Frequently Asked Questions
How long can a wet tent stay packed before mildew starts?
Mildew spores typically germinate within 48-72 hours in warm, moist conditions. In cool weather (below 60°F), you might have 4-5 days. The safest practice is to dry your tent within 24 hours of returning home, regardless of season. If you absolutely can't dry it immediately, store the packed tent in a refrigerator or cooler with ice packs — the cold temperature inhibits mildew growth and buys you an extra day or two.
Can I use a hairdryer or space heater to speed up drying?
You can, but with extreme caution. Keep any heat source at least 3 feet away from tent fabric and use the lowest heat setting. Direct heat or close proximity will melt synthetic fabrics, delaminate waterproof coatings, and void your warranty. A box fan is always safer and nearly as effective. If you must use heat, target tent poles and stakes only, never fabric.
What if my tent already smells like mildew?
Early-stage mildew (musty smell but no visible spots) responds well to the vinegar treatment described earlier. For visible black or green spots, hand-wash the affected panels with warm water and specialized tent cleaner like Nikwax Tech Wash, then treat with Revivex Instant Waterproofing Spray to restore protection. Severe mildew that has penetrated deep into fabric is often irreversible and indicates the tent has reached end-of-life.
Is it better to stuff or roll a tent when packing?
For long-term storage, loosely stuff or fold your tent and store it uncompressed. For trail use, stuffing is actually preferable because it distributes stress across the fabric randomly rather than creating permanent crease lines. However, if your tent is damp, rolling it loosely gives you better control over how moisture distributes and makes it easier to unroll for drying later.
Do expensive tents dry faster than budget models?
Generally, yes. Premium tents use lighter-weight fabrics with better moisture-wicking properties and more sophisticated coating technologies. The Big Agnes Copper Spur HV UL2 dries significantly faster than a budget tent of the same size because its materials are engineered for minimal water retention. However, proper drying technique matters more than tent price — a well-managed budget tent will outlast a neglected premium model every time.
Final Thoughts
Drying your tent properly is the single most important maintenance task you'll perform as a backpacker. It takes minimal time, requires no special equipment, and dramatically extends the lifespan of your investment. Whether you're racing against a morning storm at camp or methodically caring for your gear at home, the principles remain the same: maximize airflow, avoid heat damage, and never store a tent with residual moisture.
The difference between a tent that lasts three seasons and one that serves you for a decade comes down to these simple practices. Treat your shelter with the same respect you'd give any critical life-support equipment, because that's exactly what it is when you're miles from civilization.
Start implementing these techniques after your next trip. Your gear — and your nose — will thank you for years to come.
Editor's Choice
Big Agnes Copper Spur HV UL2 — The ultimate choice for backpackers who value quick-drying performance and ultralight construction without sacrificing durability or weather protection.
MSR Hubba Hubba NX 2 — A proven 3-season workhorse with exceptional ventilation design that makes field drying easier and reduces condensation from the start.
TETON Sports Mountain Ultra — Best budget option for beginners who want reliable performance and straightforward maintenance without premium pricing.