Disclosure: As an Amazon Associate, HikePod earns from qualifying purchases at no extra cost to you.
⭐ Our Top Pick
🏆 Best Emergency Gear: SOL Escape Lite Bivvy Emergency Sleeping Bag — reflects 90% body heat while its bright orange shell serves as a visible daytime signal.
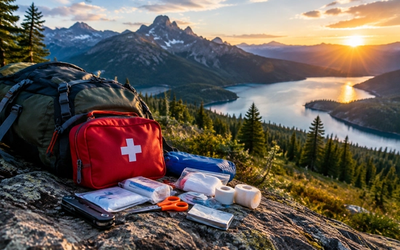
💰 Best Value: Adventure Medical Kits Ultralight Watertight .7 First Aid Kit — watertight DryFlex bag protects medical supplies and critical fire-starting materials for under $35.
Introduction
When you're lost or injured in the backcountry, a signal fire can mean the difference between a quick rescue and a multi-day ordeal. But most hikers have never actually built one, and the romanticized campfire techniques from survival shows won't cut it when visibility and fuel efficiency matter most.
We've researched the proven techniques used by search-and-rescue teams, wildland firefighters, and survival instructors to identify what actually works. The truth is that building an effective signal fire requires different materials, construction methods, and positioning than a standard campfire. You need maximum smoke during the day, maximum flame at night, and a pattern that unmistakably signals distress rather than a casual camper.
This guide covers the three-fire international distress pattern, the fuel sources that produce the most visible smoke, and the site selection strategies that maximize your chances of being spotted from the air or distant ridgelines. We'll also address common mistakes that waste precious energy and materials when every calorie counts. If you're preparing your backcountry safety knowledge—alongside essentials like knowing what to do if you encounter a snake, bear, or mountain lion on the trail—this is the signal fire primer you need in your mental toolkit.
What to Look For in Signal Fire Preparation
Visibility Over Heat — Signal fires prioritize smoke (daytime) and flame height (nighttime) rather than warmth. You need billowing white or black smoke that contrasts with the environment, not the efficient coals of a cooking fire.
The Three-Fire Pattern — The international distress signal is three fires arranged in a triangle or straight line, each roughly 100 feet apart. This pattern is unmistakable and tells rescuers you need help rather than just camping.
Fuel Staging System — Collect and organize three categories before you light anything: tinder (ignites instantly), kindling (sustains initial flame), and signal fuel (green boughs for white smoke, petroleum products or rubber for black smoke). Running out mid-signal wastes your ignition source.
Site Selection Strategy — Choose open areas visible from above—ridgelines, clearings, lakeshores, or dry riverbeds. Avoid dense forest canopy that obscures smoke. Consider wind direction: you want smoke to rise vertically, not blow horizontally into trees.
Sustainable Burn Rate — A signal fire that burns out in 10 minutes is useless. Build a base that sustains for 20–30 minutes minimum, with staged fuel piles you can add without smothering the flame. Search aircraft often make multiple passes.
Weather-Proofing — Wet conditions are when you're most likely to need rescue, so prep techniques for damp fuel: feather sticks, standing dead wood, birch bark, resinous pine knots. Store your best tinder inside your clothing to keep it dry.
The Three-Fire Distress Pattern: Why It Matters
| Criteria | Score |
|----------|-------|
| Recognition by Rescuers | 10/10 |
| Fuel Efficiency | 7/10 |
| Setup Time Required | 6/10 |
| Visibility from Air | 9/10 |
The universal distress signal recognized by search-and-rescue teams worldwide is three fires arranged in an equilateral triangle (ideally 100 feet per side) or a straight line with equal spacing. This pattern is codified in survival training because it cannot be mistaken for a campsite, lightning strike, or natural phenomenon.
You don't need to keep all three burning continuously—that's a massive fuel expenditure. Instead, build three complete fire lays (tinder, kindling, and signal fuel staged beside each) so you can ignite all three rapidly when you hear an aircraft or see a search party. During the day, focus on one fire with maximum smoke production, then light all three when rescuers are near.
The straight-line pattern works better on ridgelines or open slopes where terrain restricts your layout options. The triangle is superior in meadows or beaches because it's visible from more angles. Space them far enough apart that they read as distinct points from altitude—search aircraft typically fly at 1,000–5,000 feet AGL, and fires closer than 75 feet blur together.
💡 Pro Tip: If you can only manage one fire due to injury or fuel scarcity, make it count. Place it in the most visible spot and focus all energy on maximum smoke or flame rather than spreading resources thin.
✅ Pros:
- Universally recognized distress signal across all jurisdictions
- Visible from miles away in open terrain
- Scalable—build one fire first, add two more as energy allows
❌ Cons:
- Requires triple the fuel and ignition sources
- Time-intensive setup when you may be hypothermic or injured
- Less effective in dense forest canopy
Daytime Signals: White Smoke vs. Black Smoke
| Criteria | Score |
|----------|-------|
| Visibility in Clear Conditions | 9/10 |
| Contrast Against Environment | 8/10 |
| Fuel Availability | 6/10 |
| Toxicity/Safety | 7/10 |
Daytime signal fires are all about smoke volume and contrast. White smoke shows up against dark terrain (forest, rock, shadow), while black smoke contrasts with snow, sand, or pale desert landscapes.
White smoke comes from burning green vegetation—fresh pine boughs, wet leaves, damp grass. Once you have a solid coal bed from dry wood, pile on the green material. It smothers the flame but produces thick white billows. Avoid completely extinguishing your fire—maintain a hot core so you can add more green fuel as smoke thins.
Black smoke requires petroleum-based materials: rubber (tire chunks, shoe soles), plastic, oil-soaked fabric. These burn toxic and acrid, but produce dense black columns visible for miles. Only use these in true emergencies and stay upwind—inhaling the fumes causes respiratory damage. One hiker we researched used a section of bicycle tire inner tube to create a smoke signal visible from 8 miles away in Utah's canyon country.
The key mistake is adding signal fuel too early, before you have a strong coal bed. Green boughs on a weak flame just smother it. Build your fire up with dry kindling for 5–10 minutes first, until you have glowing coals and sustained flame, then add the smoke-producing material in stages.
💡 Pro Tip: Carry a small emergency bivvy like the SOL Escape Lite Bivvy in your pack—its bright orange shell can be laid flat near your fire as a visual signal, and it'll keep you warm overnight if rescue is delayed.
✅ Pros:
- Visible in daylight when flames are hard to spot
- Materials available in most backcountry environments
- Smoke rises high, increasing detection range
❌ Cons:
- Wind disperses smoke quickly in exposed areas
- Requires constant feeding to maintain volume
- Green fuel often scarce in arid or alpine zones
Nighttime Signals: Maximum Flame Height
| Criteria | Score |
|----------|-------|
| Visibility After Dark | 10/10 |
| Fuel Efficiency | 5/10 |
| Heat Output (Survival Bonus) | 8/10 |
| Setup Simplicity | 9/10 |
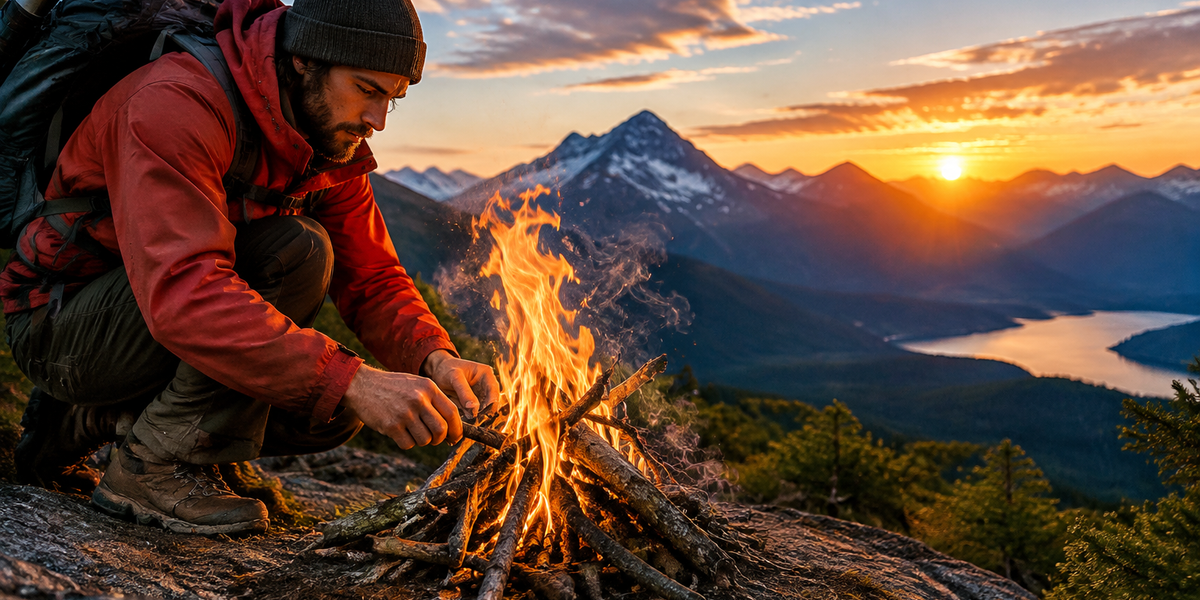
Once the sun sets, switch from smoke to flame. A tall, bright fire is visible for miles at night and shows up on aerial thermal imaging used by search helicopters. Unlike daytime smoke signals, you want dry, resinous wood that burns hot and high—standing dead pine, fat wood, birch bark.
Build a teepee or log cabin structure that allows airflow and creates vertical flame. Avoid flat, spread-out fires—you want height. Dead lower branches on standing conifers (still attached to the tree, not on the ground) are often dry even after rain and contain resin pockets that burn intensely.
If you have any petroleum products (hand sanitizer, lip balm, duct tape adhesive), use them as fire accelerants at night when flame matters more than clean smoke. A small amount of alcohol-based sanitizer on your tinder bundle can get a fire roaring in damp conditions where friction methods fail.
The Adventure Medical Kits Ultralight Watertight .7 First Aid Kit comes in a watertight DryFlex bag—a smart choice for protecting your fire-starting tools (matches, ferrocerium rod, cotton balls with petroleum jelly) from rain while you're on the trail. At only 7 oz, it's packable insurance.
✅ Pros:
- Flames visible for 10+ miles in clear conditions
- Provides warmth during cold nights awaiting rescue
- Easier to build than smoke-producing fires
❌ Cons:
- Burns through fuel rapidly—requires constant gathering
- Invisible during daylight hours
- Can attract wildlife if you're in bear country
Fuel Staging and Fire Lay Technique
Before you strike a match or spark a ferro rod, organize your fuel into three piles within arm's reach:
Tinder (ignites in seconds): Dry grass, birch bark strips, pine needles, cedar bark shavings, char cloth, dryer lint, cotton balls with petroleum jelly. You need enough to sustain flame for 30–60 seconds while kindling catches.
Kindling (sustains for 5–10 minutes): Pencil-thin to thumb-thick dry sticks. Feather sticks (wood shavings still attached to the stick) work in damp conditions. Dead twigs still on standing trees are drier than ground debris.
Signal fuel (produces smoke or flame): Green boughs for white smoke, petroleum/rubber for black smoke, or large dry logs for sustained nighttime flame. Stage this 3–5 feet away so you don't accidentally ignite it early.
The fire lay matters. For signal fires, we recommend:
- Teepee — Lean kindling against each other in a cone around your tinder bundle. Good airflow, fast ignition, produces tall flame. Collapses as it burns, so you need to add fuel frequently.
- Log cabin — Alternate layers of kindling at 90-degree angles, with tinder in the center. Burns slower and more evenly, better for sustained daytime smoke fires.
- Platform fire — Lay two large green logs parallel, fill the gap with tinder and kindling. The green logs won't burn but contain and reflect heat, helping wet fuel catch.
Ignite your tinder, shelter the flame from wind with your body, and gently blow to increase oxygen. Add kindling one piece at a time—dumping it all at once smothers the flame. Once you have a self-sustaining fire with small flames, add progressively larger fuel until you have a coal bed, then switch to signal fuel (smoke material for day, large flame-producing logs for night).
💡 Pro Tip: If conditions are wet, wear a Buff headwear around your neck and use it to protect your mouth from smoke inhalation when working close to the fire. You can also use it to carry dry tinder inside your jacket to keep it warm and moisture-free.
Site Selection: Where to Build for Maximum Visibility
Even a perfect signal fire is useless if nobody can see it. Prioritize these locations:
Ridgelines and high points — Visible from multiple valleys and against the skyline. Wind is usually stronger here, so build a rock windbreak on three sides.
Open meadows and clearings — No canopy to obscure smoke. Choose the center, not the edge where trees block sightlines.
Lakeshores and riverbanks — Flat, open, and often near flight paths for float planes or helicopters following waterways. Sand and gravel provide non-flammable bases.
Dry riverbeds — Aerial searchers follow drainage patterns. The pale rock contrasts with dark smoke.
Avoid dense forest, narrow canyons where smoke is trapped, and areas with overhanging branches that could ignite and start a wildfire. If you're injured and can't move far, clear a 10-foot radius around your fire site and build on bare dirt or rock.
Consider wind direction: You want vertical smoke columns, not horizontal plumes blown into trees. If wind is strong, position your fire on the leeward side of a natural windbreak (boulder, ridge), but ensure it's still visible from above.
Common Mistakes That Waste Energy and Materials
Starting too early — Don't light your signal fire the moment you realize you're lost. Conserve fuel and energy for when rescuers are actually searching. If you filed a trip plan, they won't start looking until you're overdue (usually 24 hours). Use the time to gather fuel, build your fire lays, and improve your shelter.
Building in the wrong location — A signal fire under dense canopy is invisible from the air. Relocate to open terrain even if it means 30 minutes of extra walking.
Not staging fuel in advance — Running around gathering sticks while your fire dies is inefficient. Collect 3× more fuel than you think you need before ignition.
Using wet fuel too soon — Green boughs for smoke only work if you have a strong coal bed first. Adding them to a weak flame smothers it.
Ignoring the three-fire pattern — A single fire can be mistaken for a campsite. Three fires in a triangle or line is unmistakable.
Forgetting personal safety — Hypothermia kills faster than dehydration. If conditions are severe, prioritize a survival fire for warmth first (small, efficient, near your shelter), then build a signal fire once you're stable.
Frequently Asked Questions
How long should I keep a signal fire burning?
If you hear or see search aircraft, keep it burning until they clearly signal they've spotted you (circling, wing dip, flare drop). For ground searches, maintain smoke for at least 20 minutes after you see searchers—they may not spot you immediately. If no rescue is imminent, conserve fuel: build the fire lay completely, then only ignite it when you hear engines or see movement. A signal fire that burns for 6 hours straight wastes fuel you might need for multiple days.
What if I don't have matches or a lighter?
Friction methods (bow drill, hand drill) work but require practice, dry materials, and energy. A ferrocerium rod and striker is more reliable—practice before your trip. If you have none of these, focus on other signals: brightly colored gear laid in an X pattern (universal distress), mirror flashes (can be seen 10+ miles), or whistle blasts (three short, three long, three short—SOS). Prioritize shelter and warmth over fire if you can't ignite one safely.
Should I build a signal fire if there's a fire ban or high fire danger?
In official wilderness areas during fire restrictions, weigh the risk carefully. If you're truly in distress (injured, lost with no navigation, life-threatening exposure), a controlled signal fire on bare rock or sand is justified. Clear all flammable material in a 15-foot radius, never leave it unattended, and fully extinguish with water or dirt when rescue arrives. If you're just overdue but mobile and healthy, use non-fire signals instead—fire bans exist because conditions can turn catastrophic fast.
How do I signal a helicopter once they're overhead?
Switch to high-contrast visual signals: wave bright clothing, use a signal mirror, or create ground-to-air signals with rocks or logs (a large X means "need assistance", a V means "need medical help"). If your fire is still burning, pile on green boughs for maximum smoke. Do NOT shine a laser or bright flashlight at the aircraft—it's illegal and dangerous. Stay in the open where you're visible; if they circle but don't land immediately, they've seen you and are coordinating ground rescue or finding a safe landing zone.
Can I use my phone flashlight or headlamp as a signal at night?
Yes, but with limitations. Flash SOS (three short, three long, three short) repeatedly toward the search area. Strobe modes on modern headlamps are visible for miles in dark conditions. However, batteries drain fast in cold weather, so combine this with a fire. A flame is visible farther than a headlamp, but a headlamp can signal your exact position once rescuers are close. Preserve phone battery for actual communication if you regain signal—location data is more valuable than using it as a flashlight.
Final Thoughts
Building an effective emergency signal fire is a skill every backcountry traveler should understand, even if you never need to use it. The difference between a quick rescue and a dangerous multi-day wait often comes down to visibility—and that requires smoke during the day, flame at night, and the three-fire distress pattern when possible.
Remember to prioritize site selection (open terrain beats perfect technique), fuel staging (gather 3× what you think you need before ignition), and personal safety (warmth and shelter first, signal second). Most importantly, file a trip plan before every hike so searchers know when and where to look.
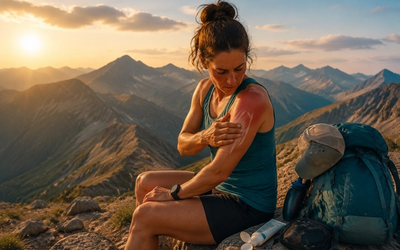
The techniques in this guide are proven by search-and-rescue professionals and verified through decades of survivor accounts. Practice your fire-building skills on every camping trip, keep waterproof ignition sources in your pack, and you'll have the confidence to signal for help if the worst happens. For more essential safety knowledge, see our guide on how to treat sunburn and heat rash on the trail to handle other common backcountry emergencies.
Editor's Choice
SOL Escape Lite Bivvy Emergency Sleeping Bag — At 3.8 oz and $19.95, this bivvy reflects 90% of your body heat during overnight waits for rescue while its bright orange shell serves as a visible daytime signal marker.
Adventure Medical Kits Ultralight Watertight .7 First Aid Kit — The watertight DryFlex bag protects your medical supplies and fire-starting materials from rain, giving you dual-purpose gear that handles injuries and keeps ignition sources dry when conditions are worst.
Buff Original Multifunctional UV Headwear — This versatile neck gaiter protects your face from smoke inhalation while tending signal fires and can be used to transport dry tinder inside your jacket to keep it warm and ready to ignite.